BeyerDynamic DT770 Mini-XLR Mod
For easier use with a Bluetooth Rx
Post published on September 04, 2021.In 2011 I bought my first set of headphones, the BeyerDynamic DT-770 Pro (250 Ohm). Even though I now own them for 10 years, they still hold up absolutely great! Of course I had to replace the ear pads and the top-strap cushion after a while, because they degrade with age and sweat and sunlight. But thanks to the very professional service of BeyerDynamic, you can get all replacement parts for a reasonable price.
I'm definitely not an audiophile, I don't use fancy expensive equipment to power these headphones. But they are more than good enough for my requirements / my ears, and I can wholeheartedly recommend them!
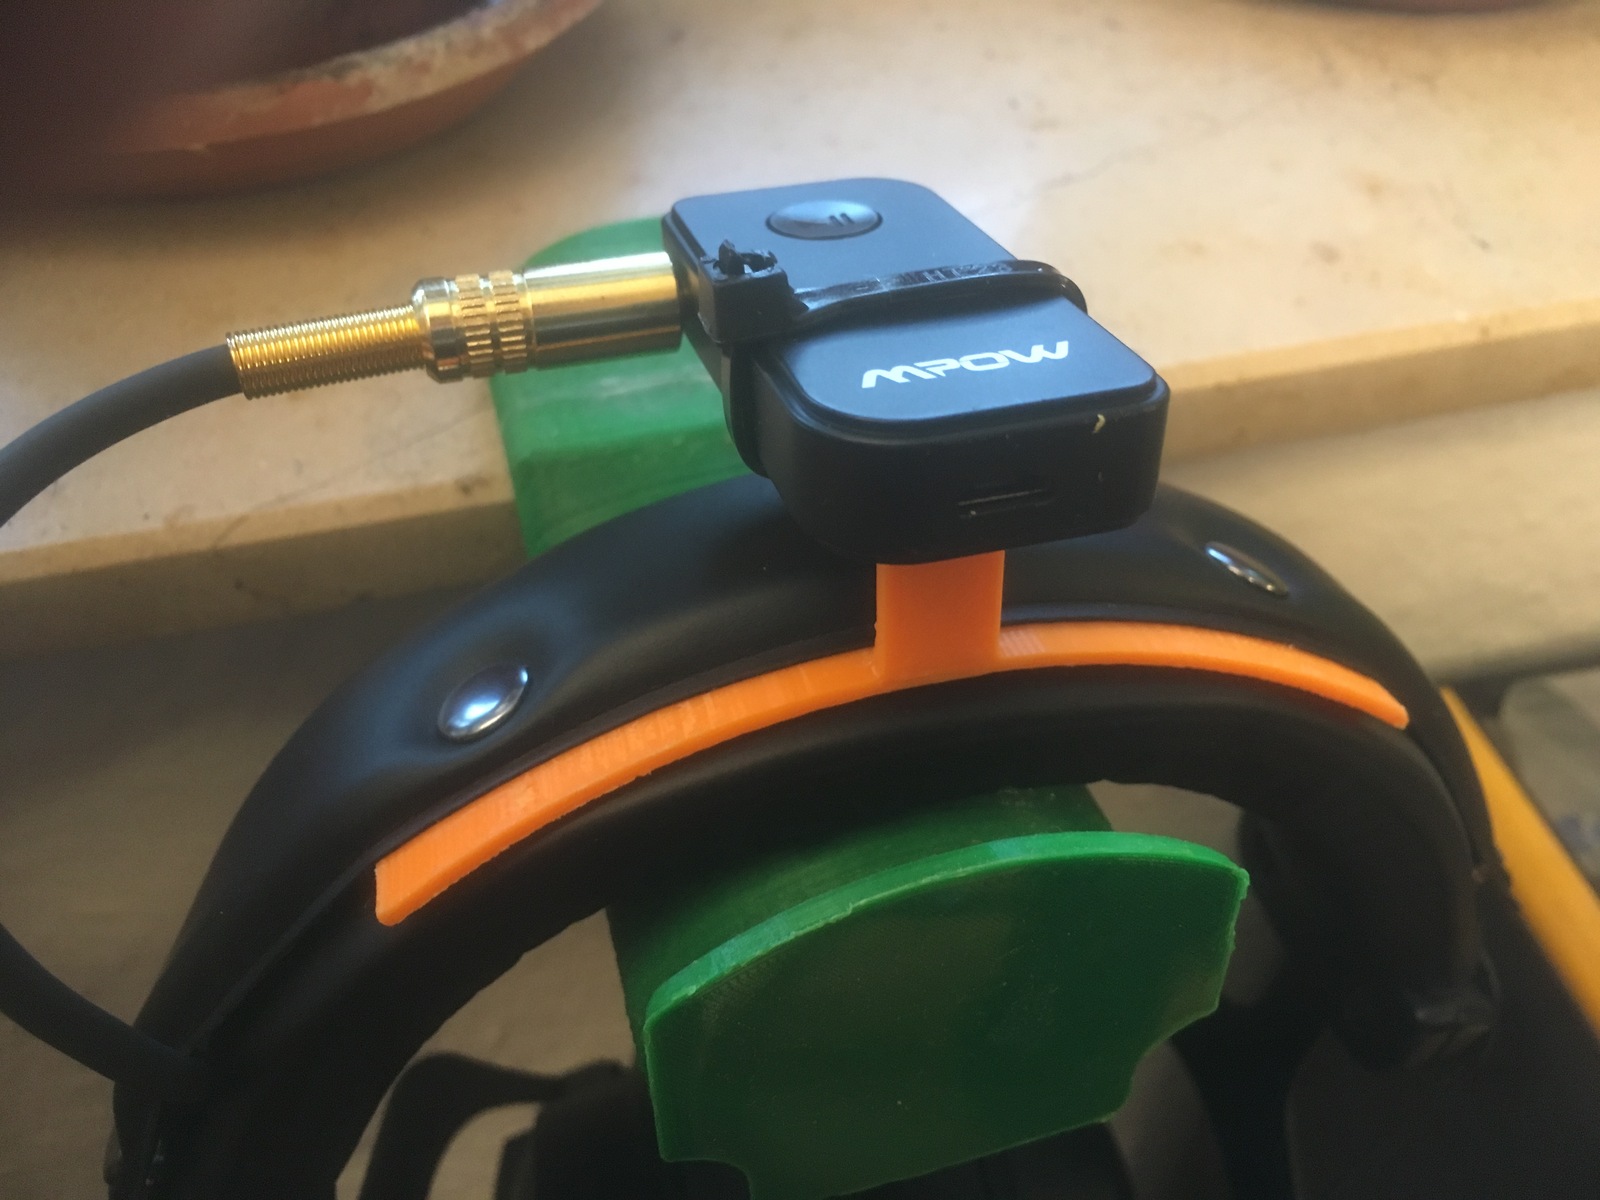
Especially being stuck at home with Corona the last year, I started using my headphones with a small Bluetooth receiver attached to them. This worked surprisingly well, even though I own the 250 Ohm version of the DT-770. The only hassle was carrying around the long and heavy cable.
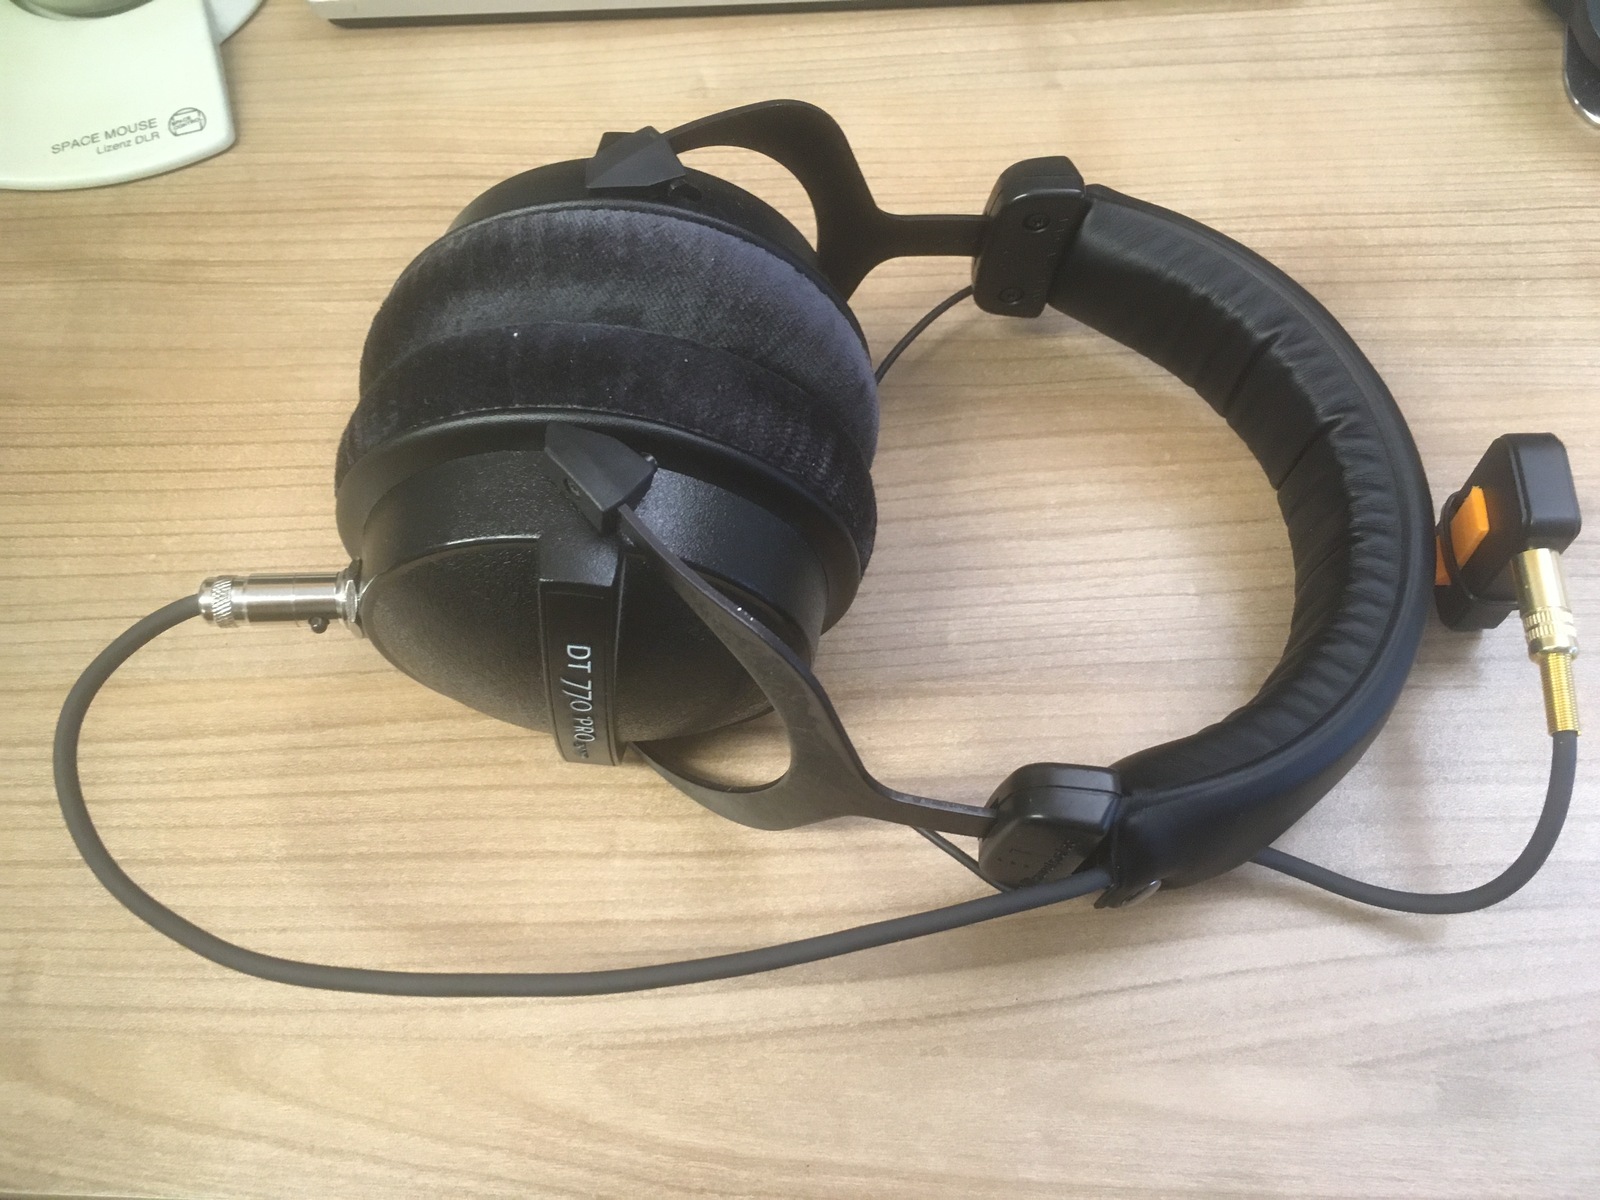
Because of this, I decided to add a Mini-XLR connector and make the cable detachable.
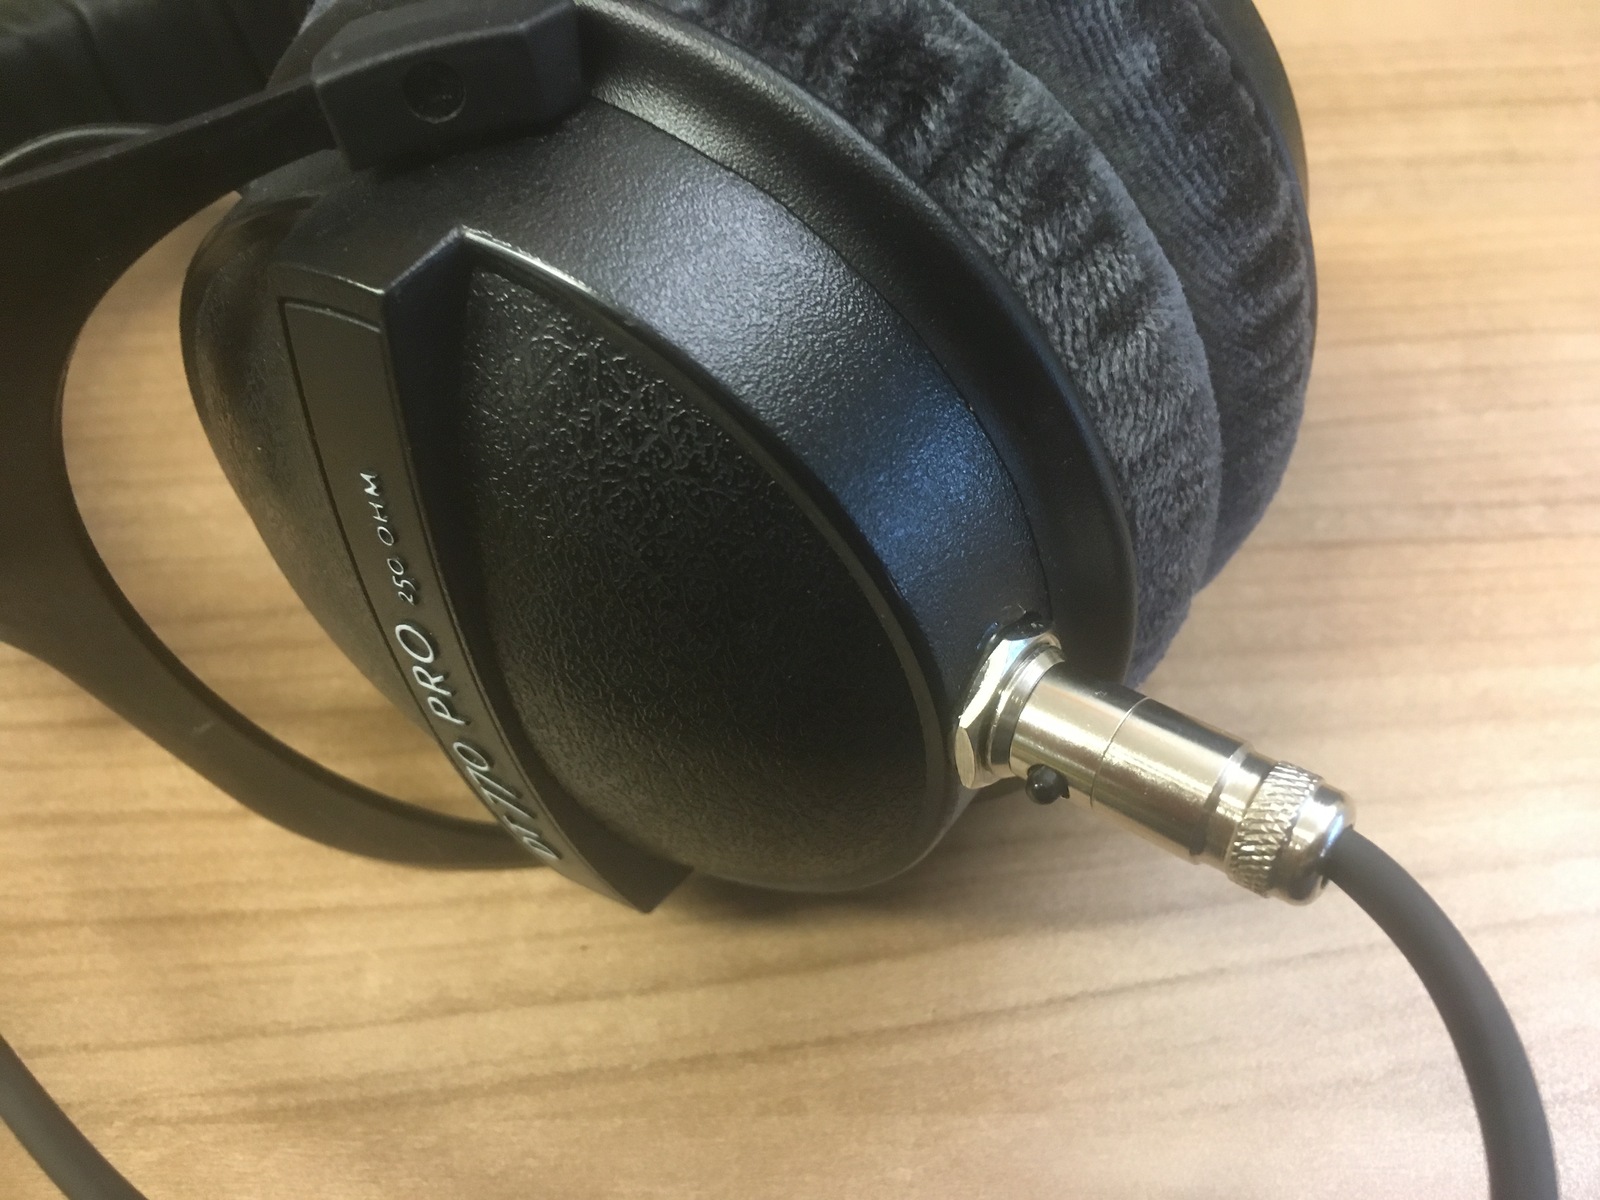
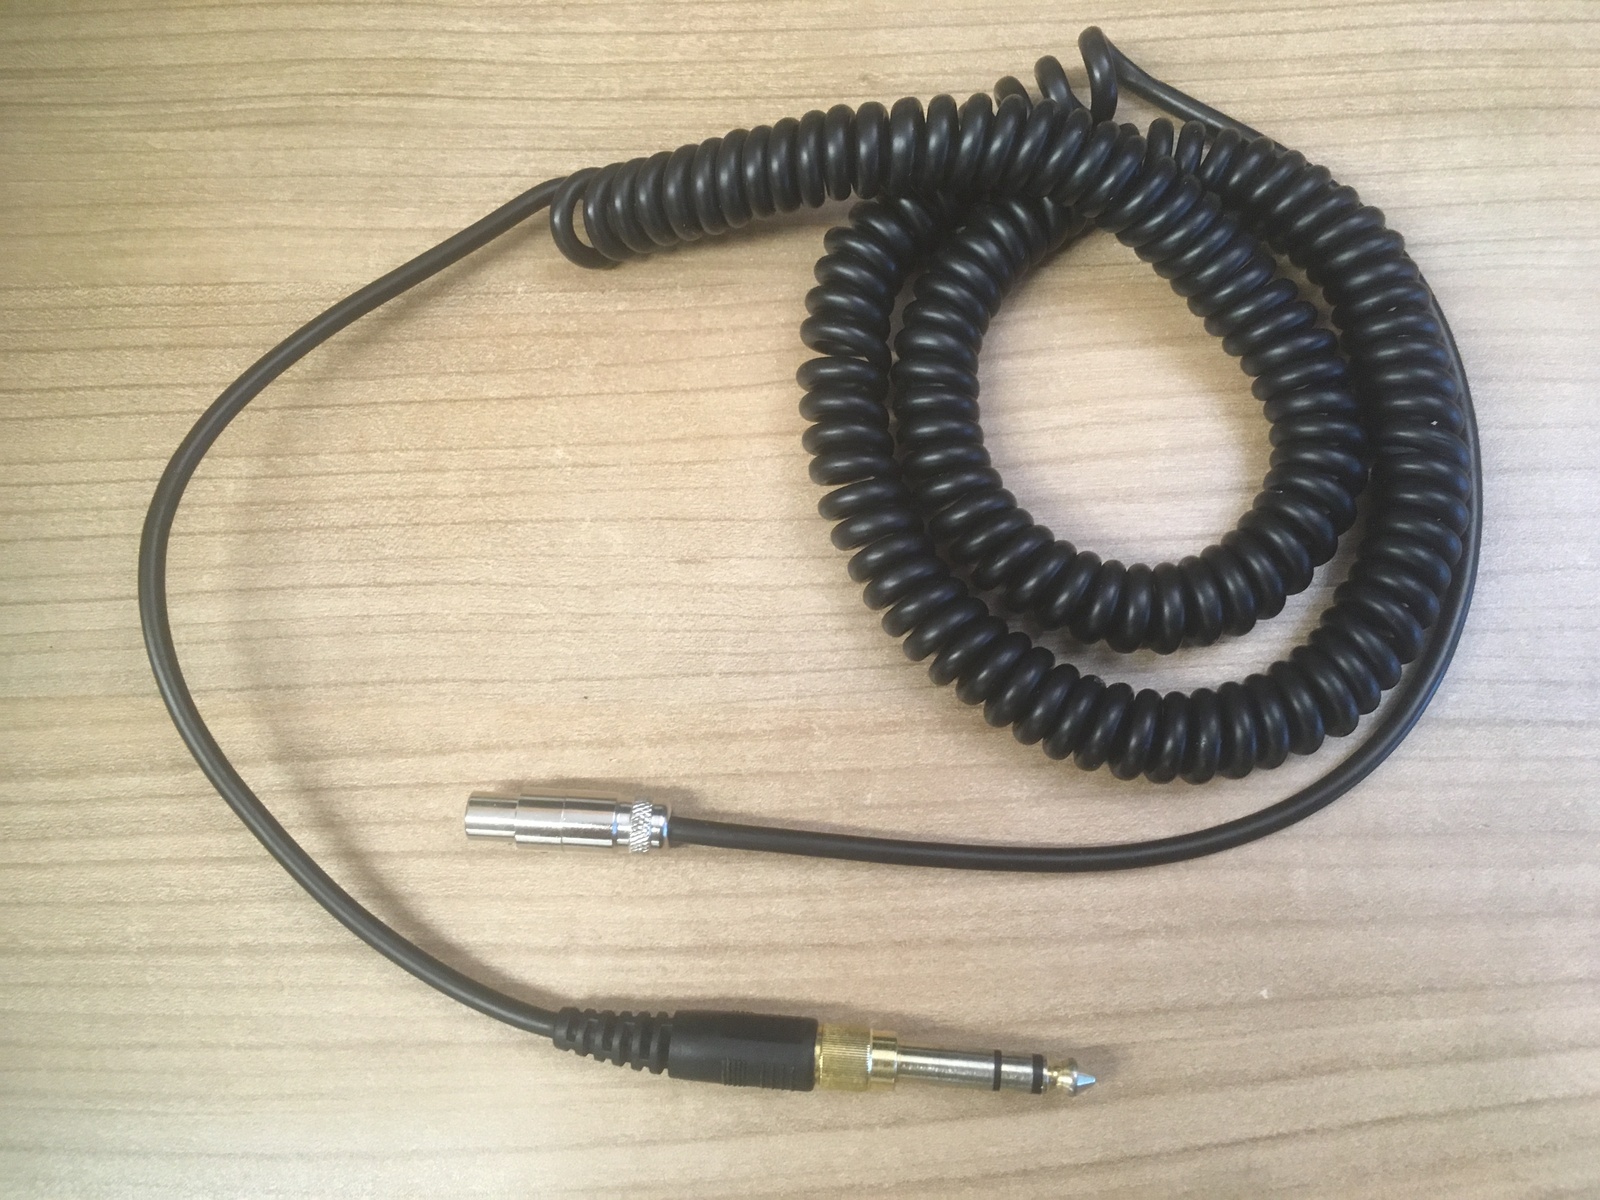
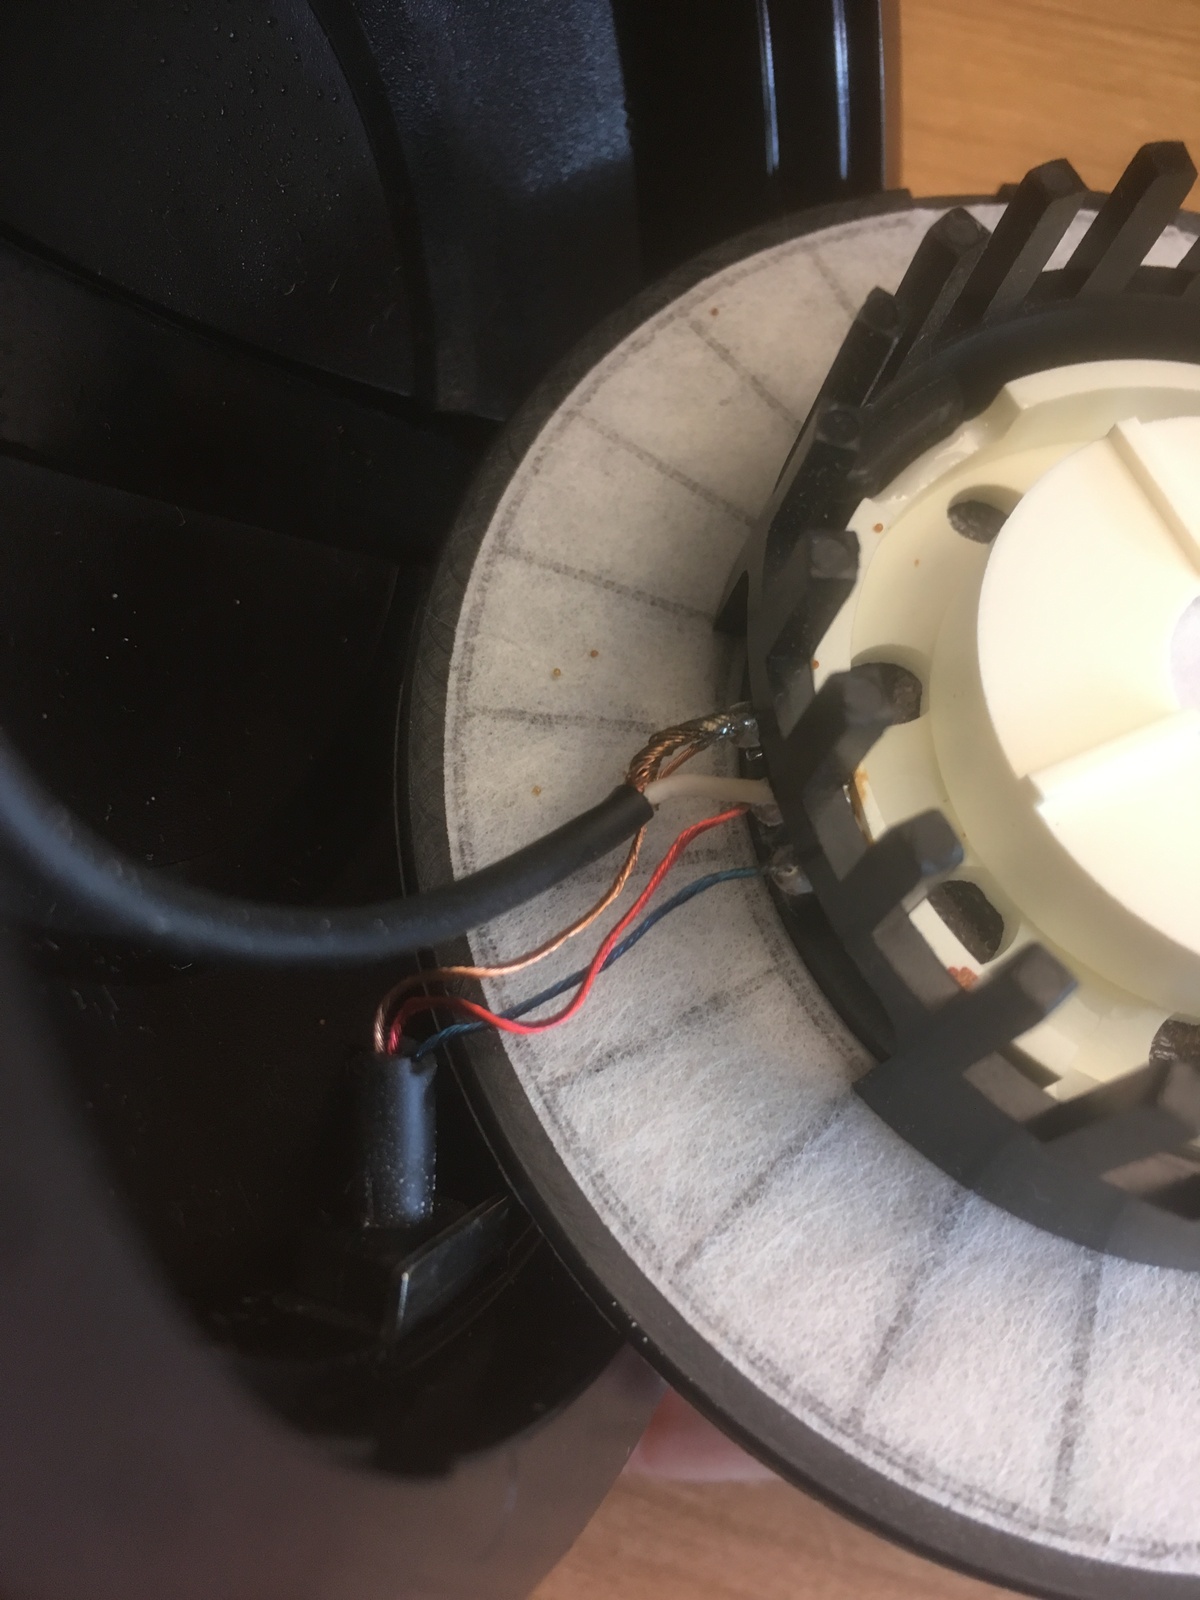
I decided to use a 4-pin connector. This way, each speaker can be connected to its own positive and negative pins, without connecting the two negative poles inside the headphones. This way, a balanced connection can be used to drive both speakers completely separately, as long as the amplifier supports it. But this is only a future option, for now I have used normal Stereo cable and a 3-pin connector for the other end, so still unbalanced.
Here is a list of the materials I bought for this little project:
| Part | Description | Cost |
|---|---|---|
| xlr-male | Mini XLR 4-pin Panel Mount Male | 2.08€ |
| xlr-female | Mini XLR 4-pin Metal Shell Female | 2.61€ |
| trs-male | 3.5mm TRS Male | 0.40€ |
| cable | Microphone Cable 2x0.1mm² Shielded | 7.99€ |
| Sum | 13.08€ |
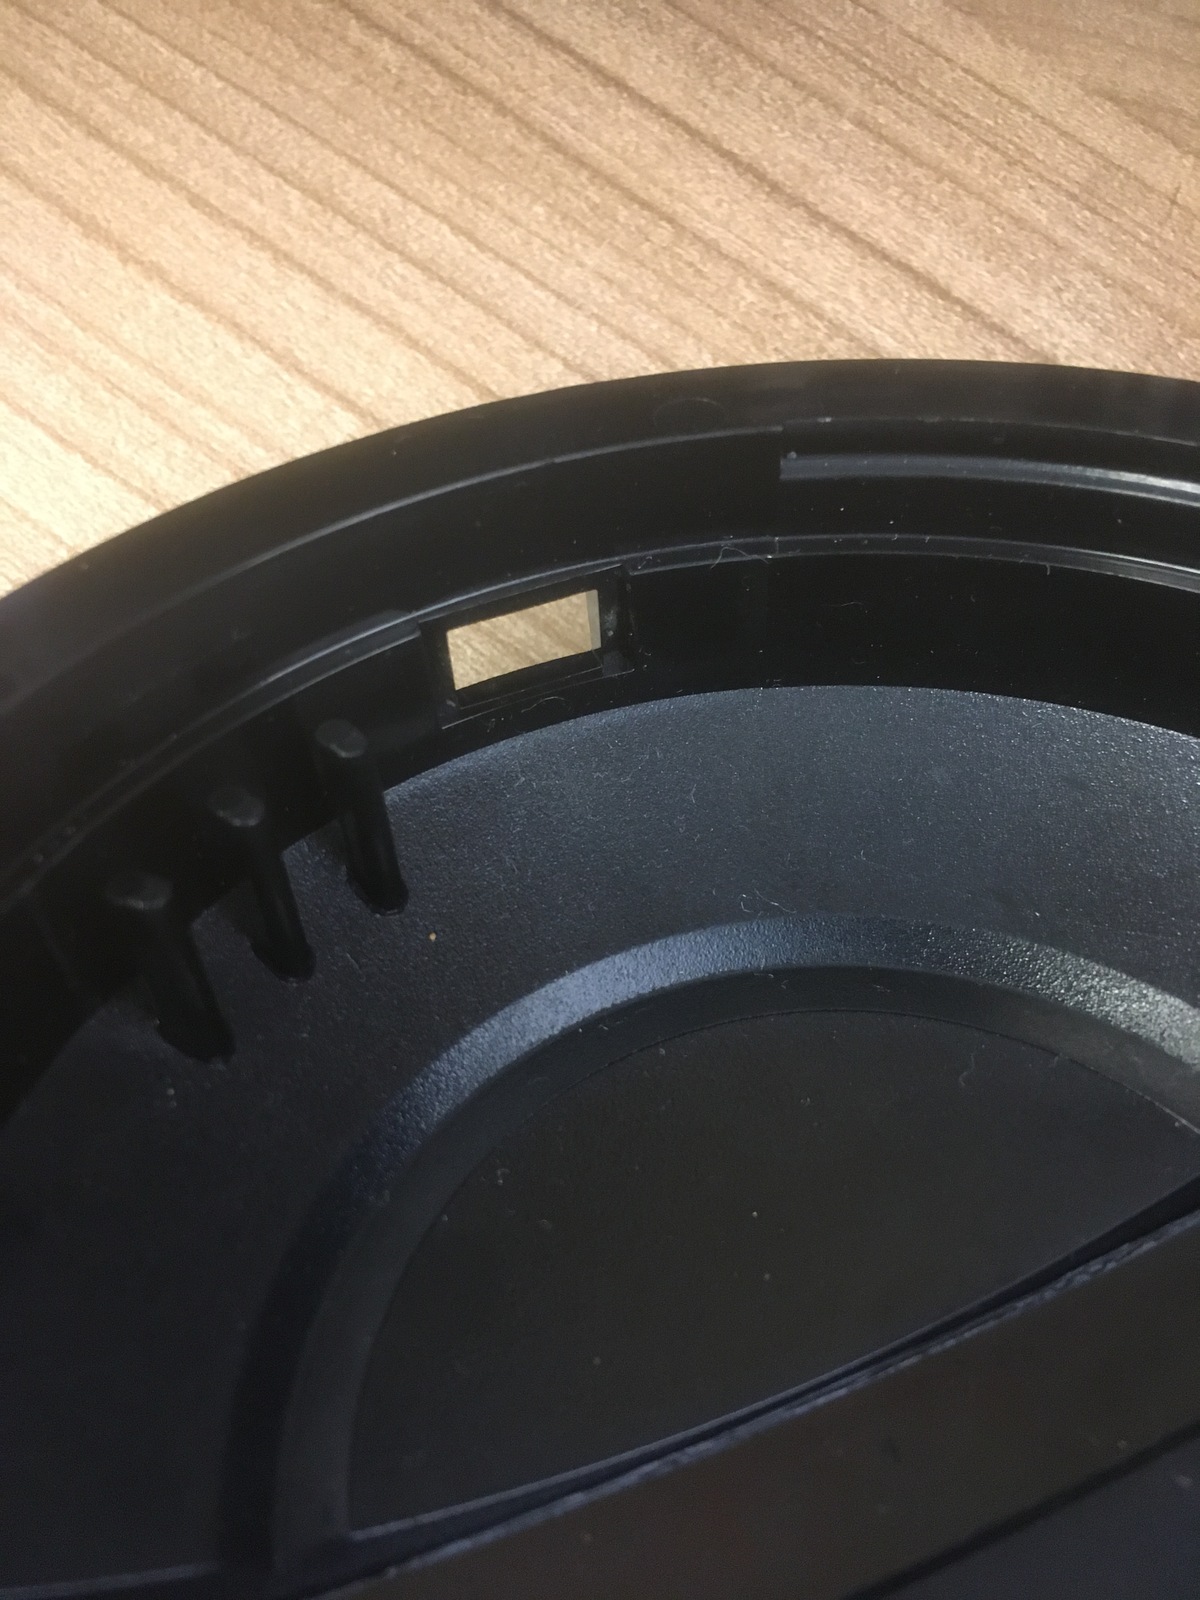
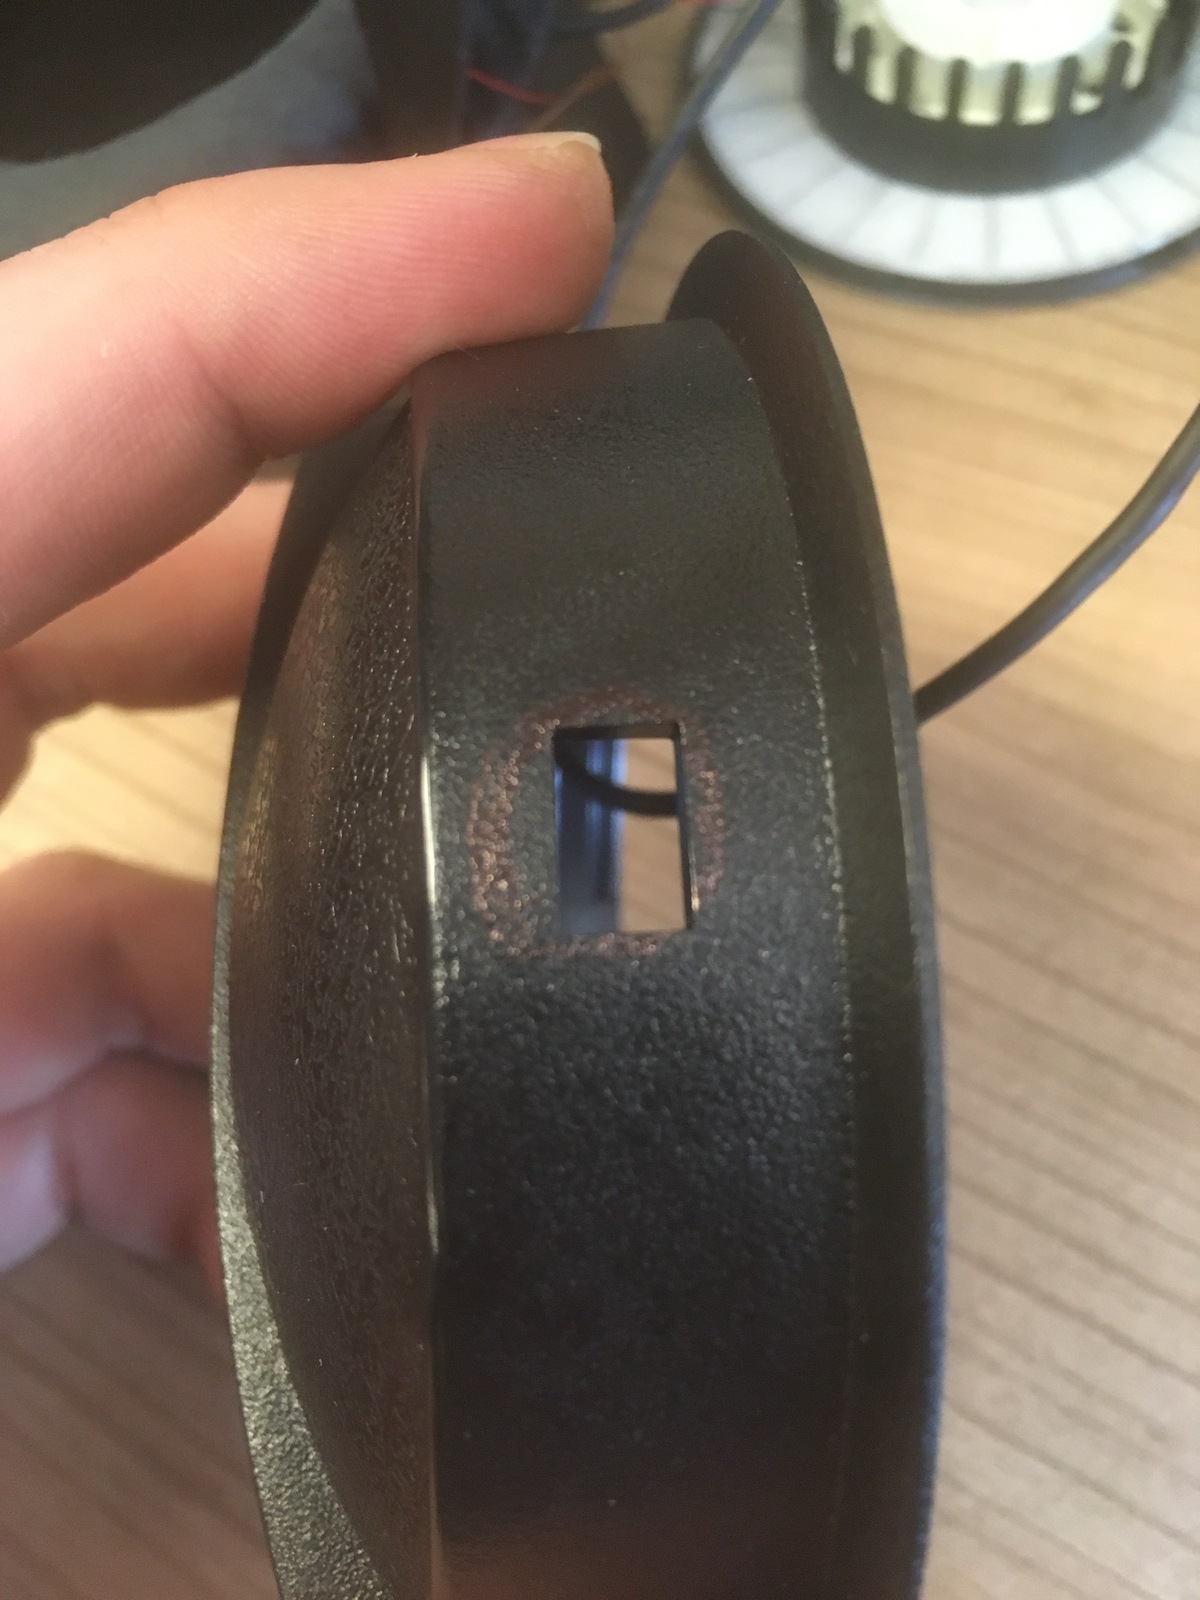
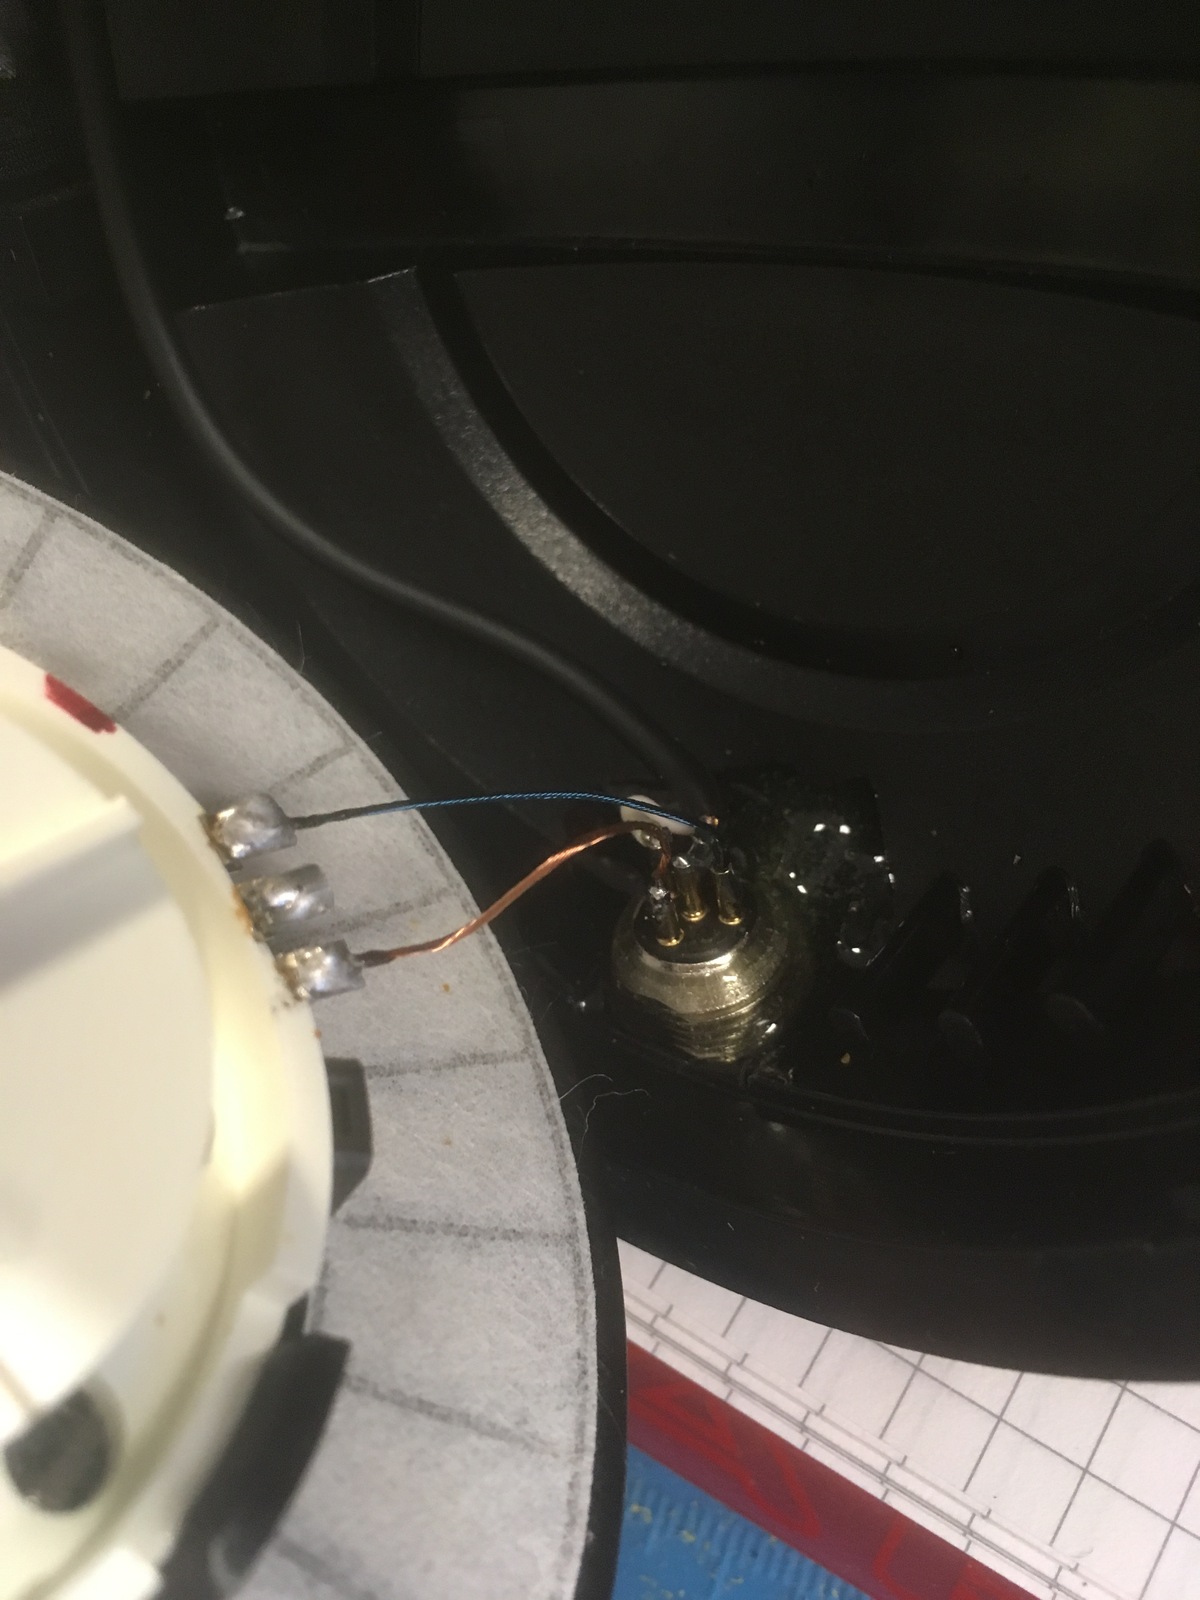
To fit the male panel mount connector to the headphone shell, the original cable hole has to be enlarged. I simply drew the estimated dimensions on the case and used a dremel to remove excess material until the connector fit just so. Make sure to move the hole as far to the outer side of the case as possible, away from the speaker.
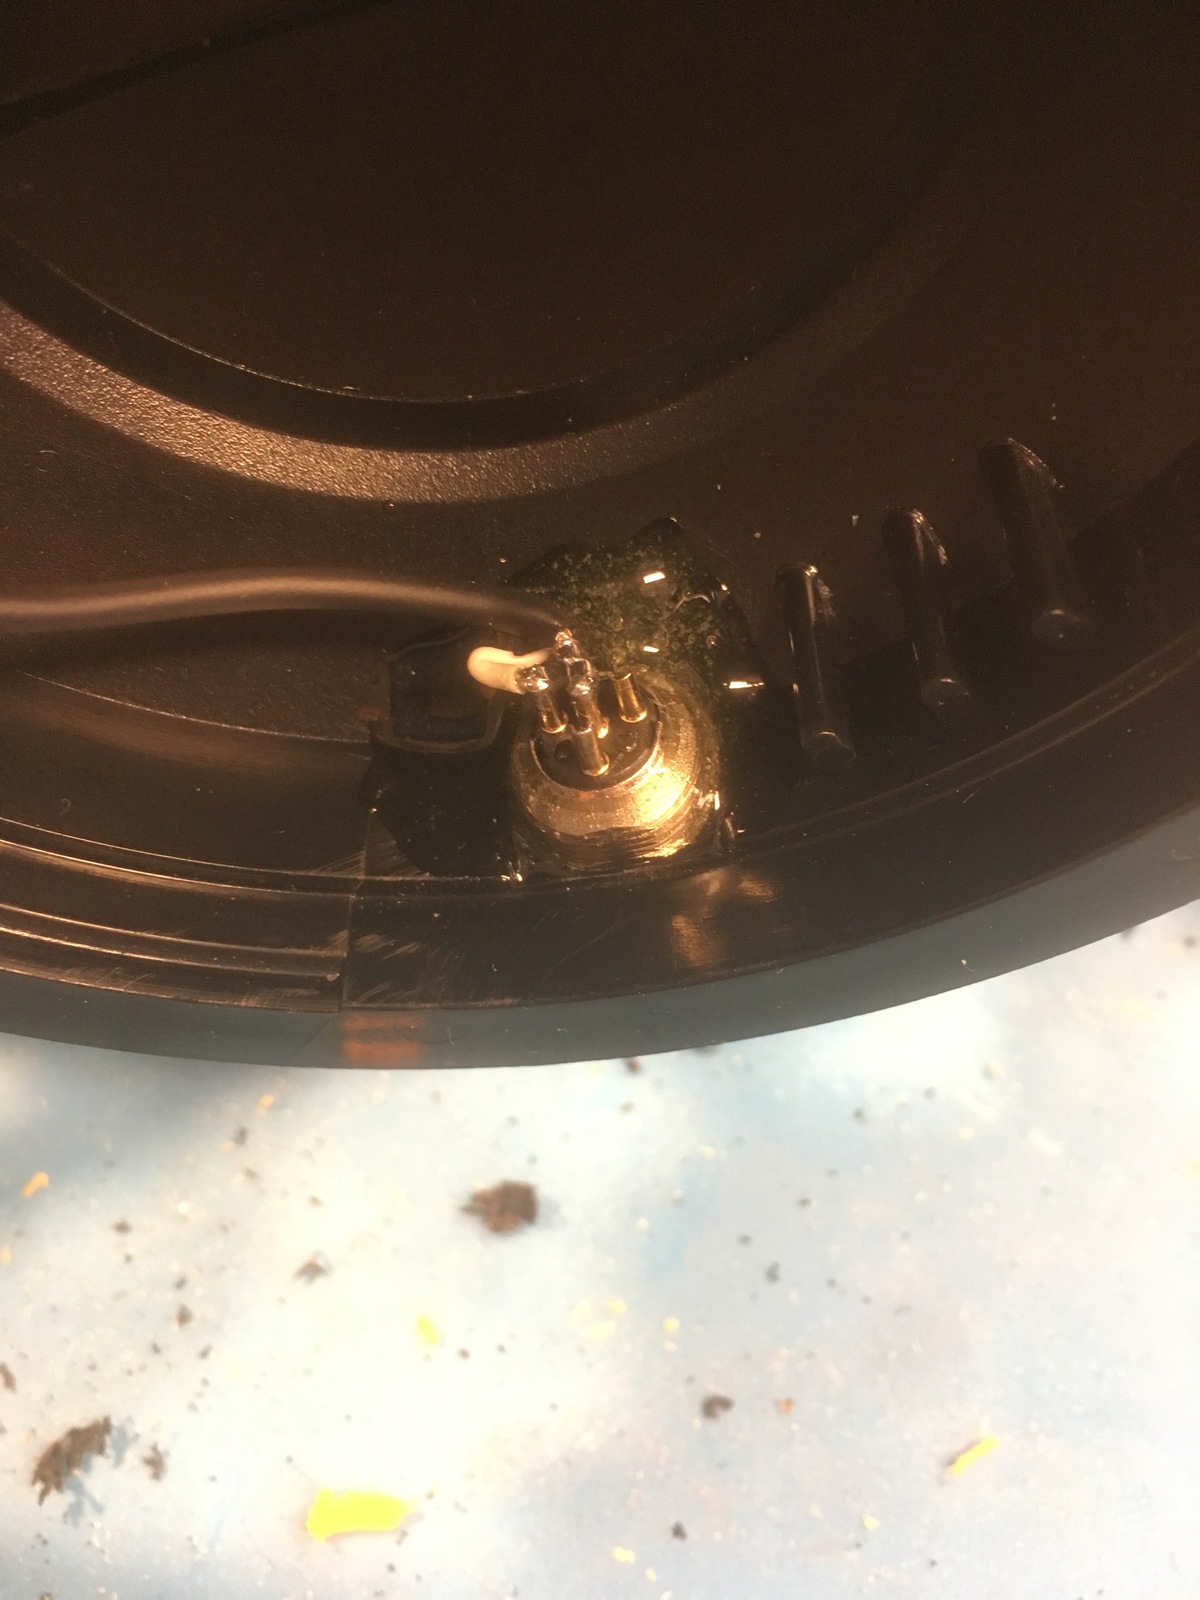
Even before attempting this, I was worried about the lack of space behind the speaker membrane. And in fact even the small Mini XLR connector was a bit too long. I had to leave a nut on the outside to reduce the length inside the case.
There is also not enough room to properly fix the connector with a nut on the inside. I decided to use epoxy resin, which seems to work fine.
This is a very common modification and others all over the internet have already done it before me. Here are some of them I found and used for inspiration.
- DT770 Pro Detachable Cable Mod with Custom 4-pin Mini-XLR to 3.5mm Cable
- The (hopefully) ultimate guide to a mini XLR detacheable cable mod for the Beyerdynamic DT 990 PRO
- Beyerdynamic Balanced Removable 4 Pin Mini XLR Mod
- Modded my DT 770 pros to detachable mini xlr
To properly hold the Bluetooth receiver and not have it dangle around, I designed a simple 3D printed piece to mount it to the top cushion. You can find it in my 3D print Git repo or on Thingiverse.

