RC Equipment
My gear and the modifications I did to it
Project published on October 09, 2015.Last updated on May 31, 2022.
...back to Flying RC Vehicles overview
Over the years of flying quadcopters and other stuff I have grown quite the collection of self-made or customized gear. I transport it all in a Quadguard BP X3 backpack.
Spectator Monitor
When out flying alone or with a partner, often people walk their dogs nearby or families go on a walk together and see us. This often sparks a conversation. For these occasions, it turned out to be very useful to have some kind of second screen and receiver with me.
A friend of mine even has a spare cheap set of FPV goggles with him most of the time.
I decided to go a slightly different route. For my first experiments, I bought the Quanum DIY FPV Goggle Set. I didn't really like the box-style of goggles, so I quickly took the monitor from the set and used it stand-alone.
After I switched to proper FatShark goggles, I used the Quanum monitor again, this time for a spectator monitor.
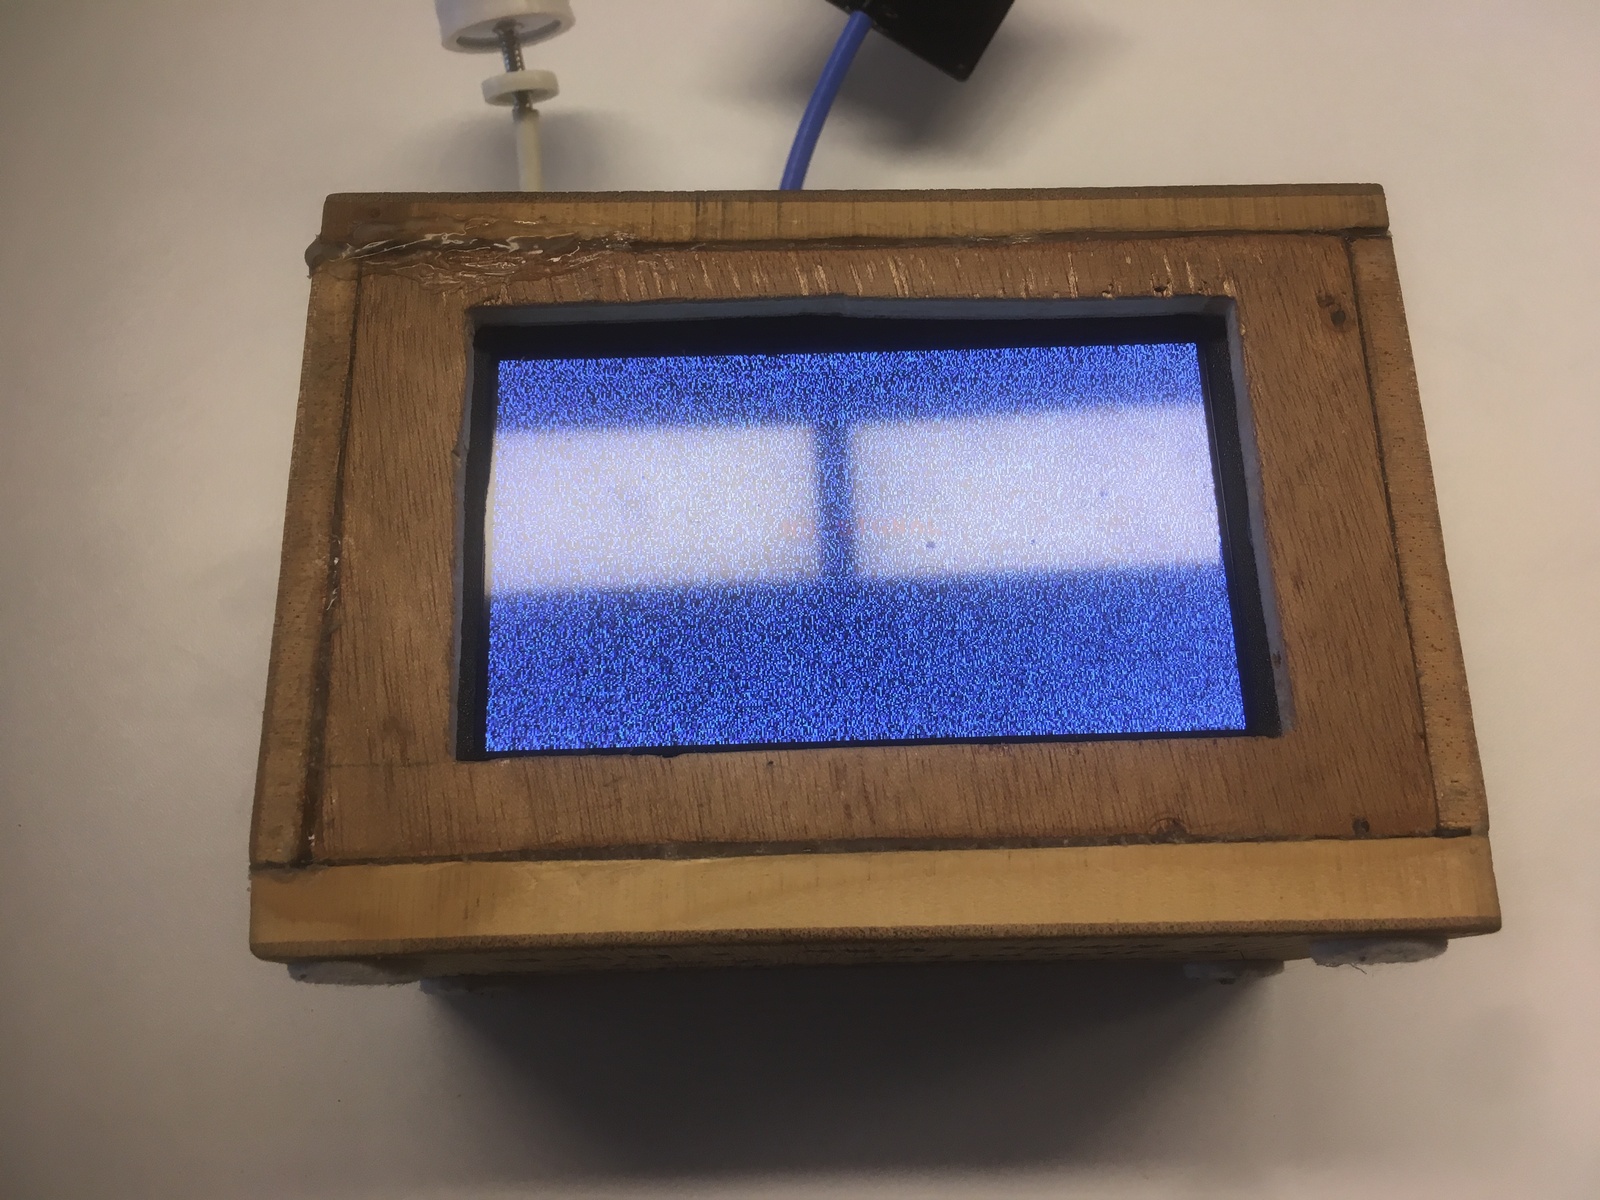
I built a simple wooden box out of left-over parts and hot-glue, with a large cut-out in the front for the monitor.
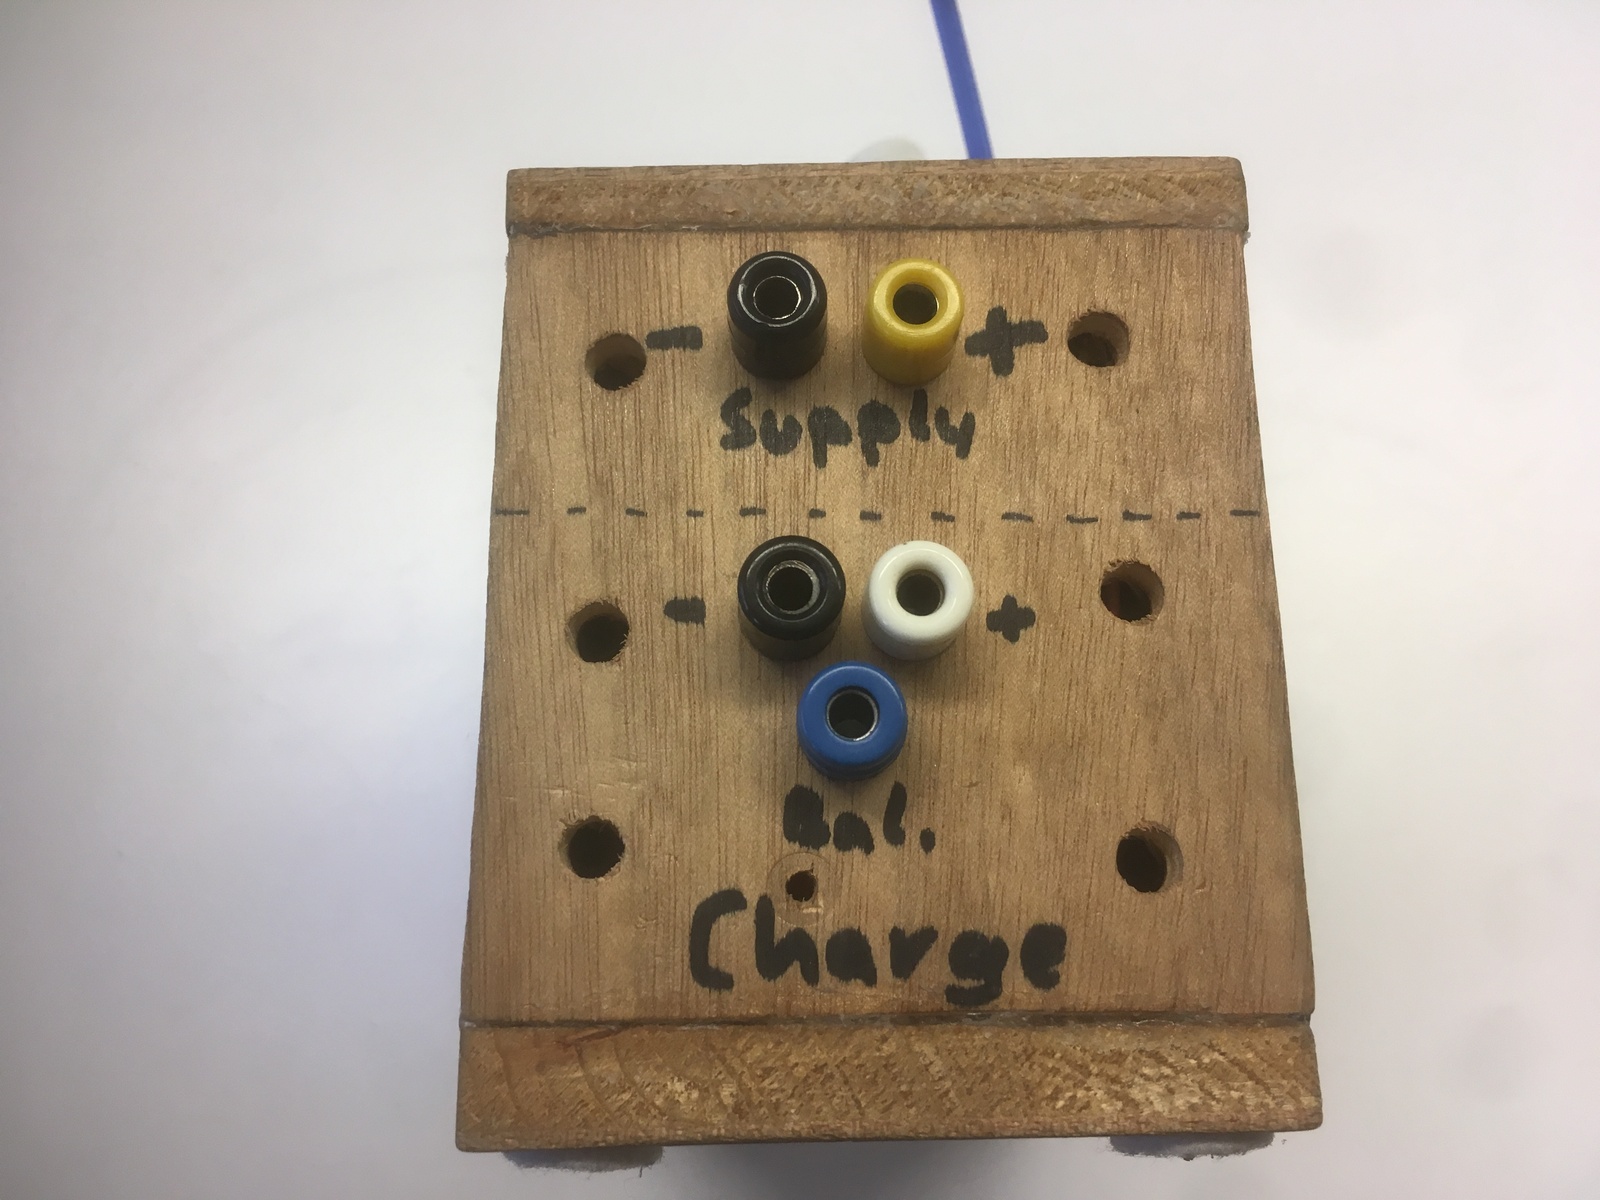
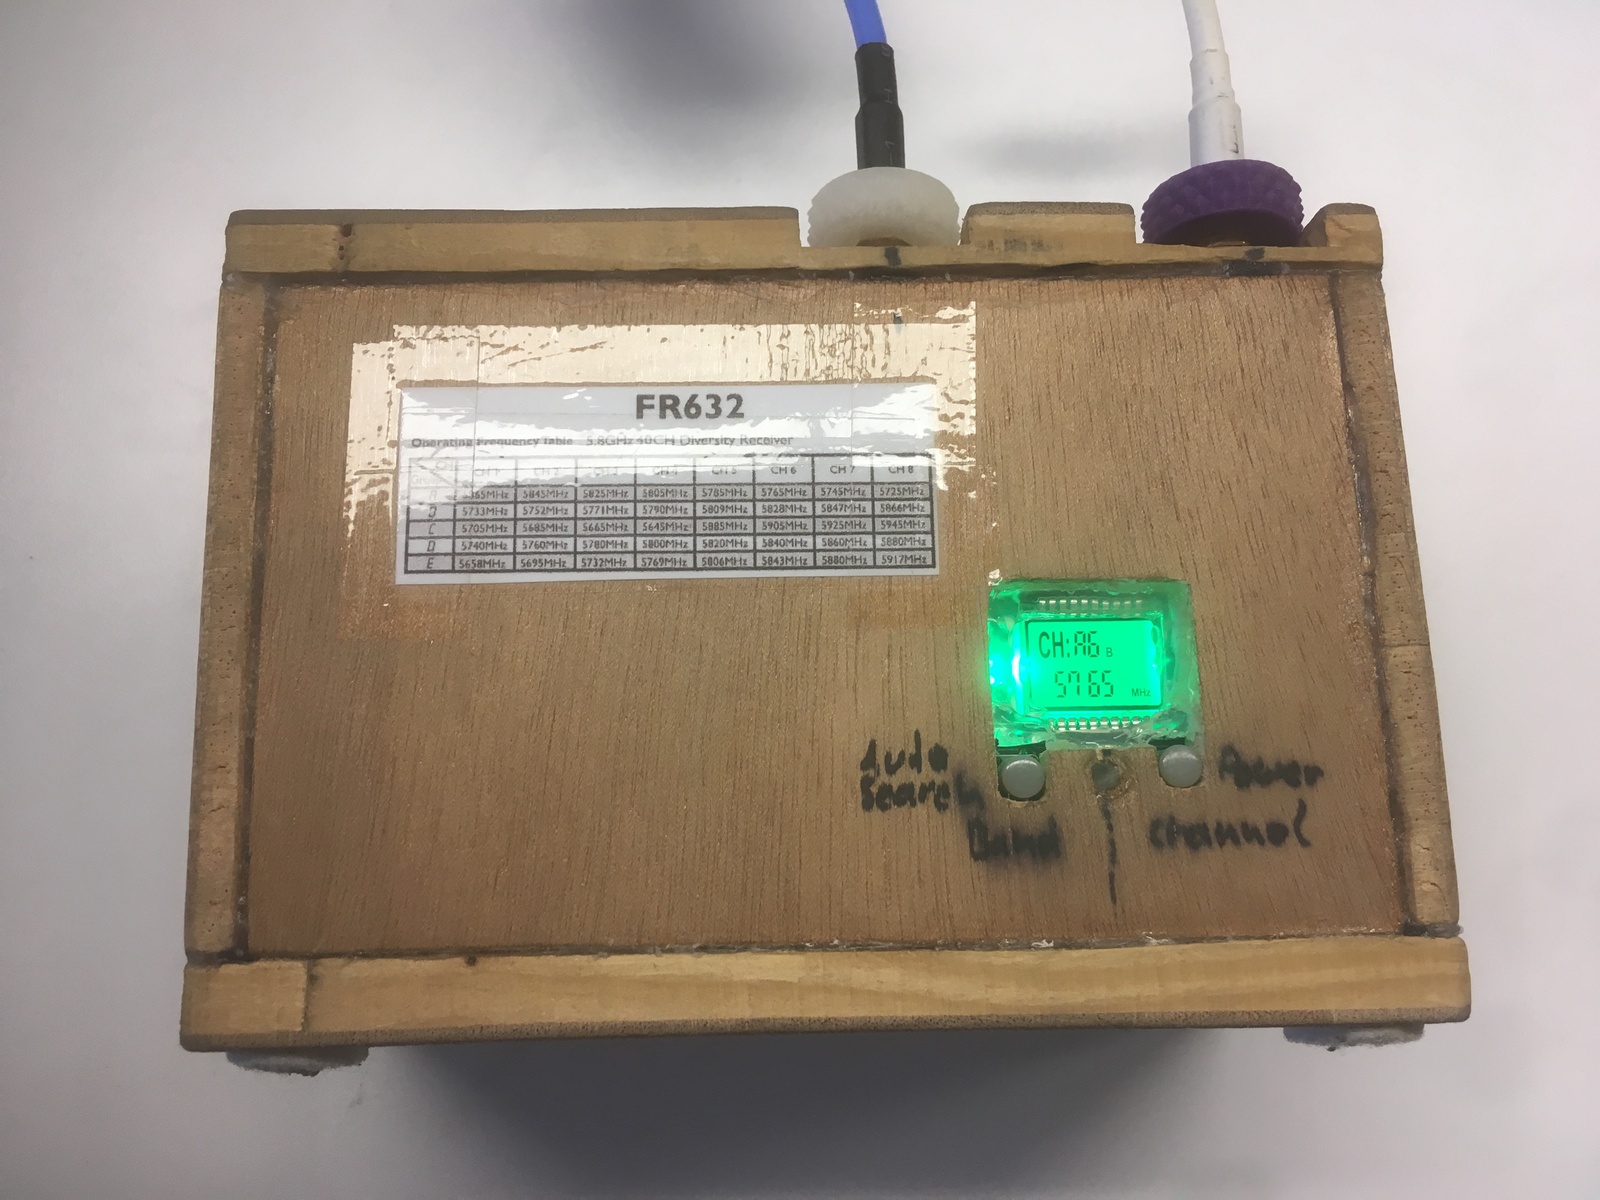
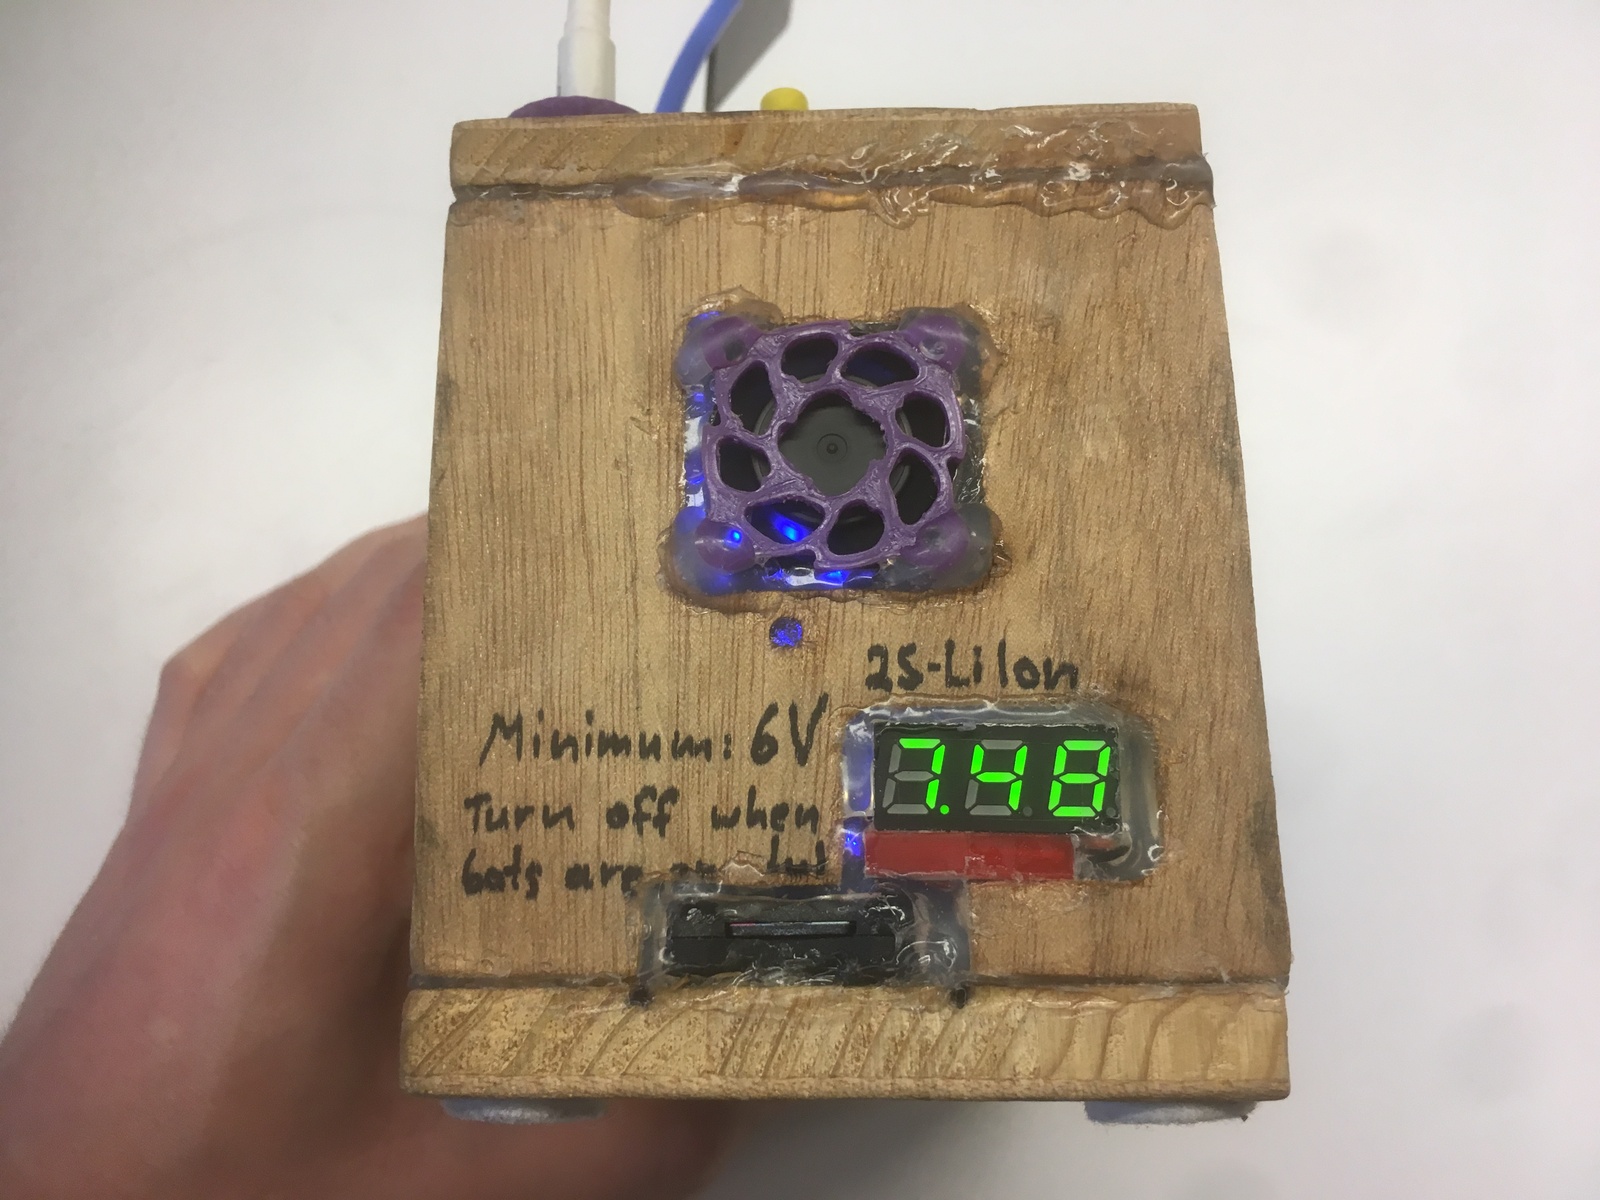
Inside is not only a FR632 Diversity Rx but also an Eachine ProDVR, 2x 18650 cells, voltage regulators, a fan and a voltmeter. The channel can be selected on the receiver, with cut-outs on the back. The DVR can be controlled using external push buttons. A power switch, as well as a switch to select either the Rx video feed or the DVR video feed, are on the top.
The batteries hold up for maybe 3 sessions with spectators. I had to add the fan after the first tests because it simply got too hot inside the box and the first DVR died after a while.
The quality of the Quanum monitor is great and it does not switch to a blue-screen when the signal is fading. The DVR does not work 100% reliable, but considering my FatShark Dominator v3 has a built-in DVR as well, I'm not really dependant on it.


Customized Transmitter
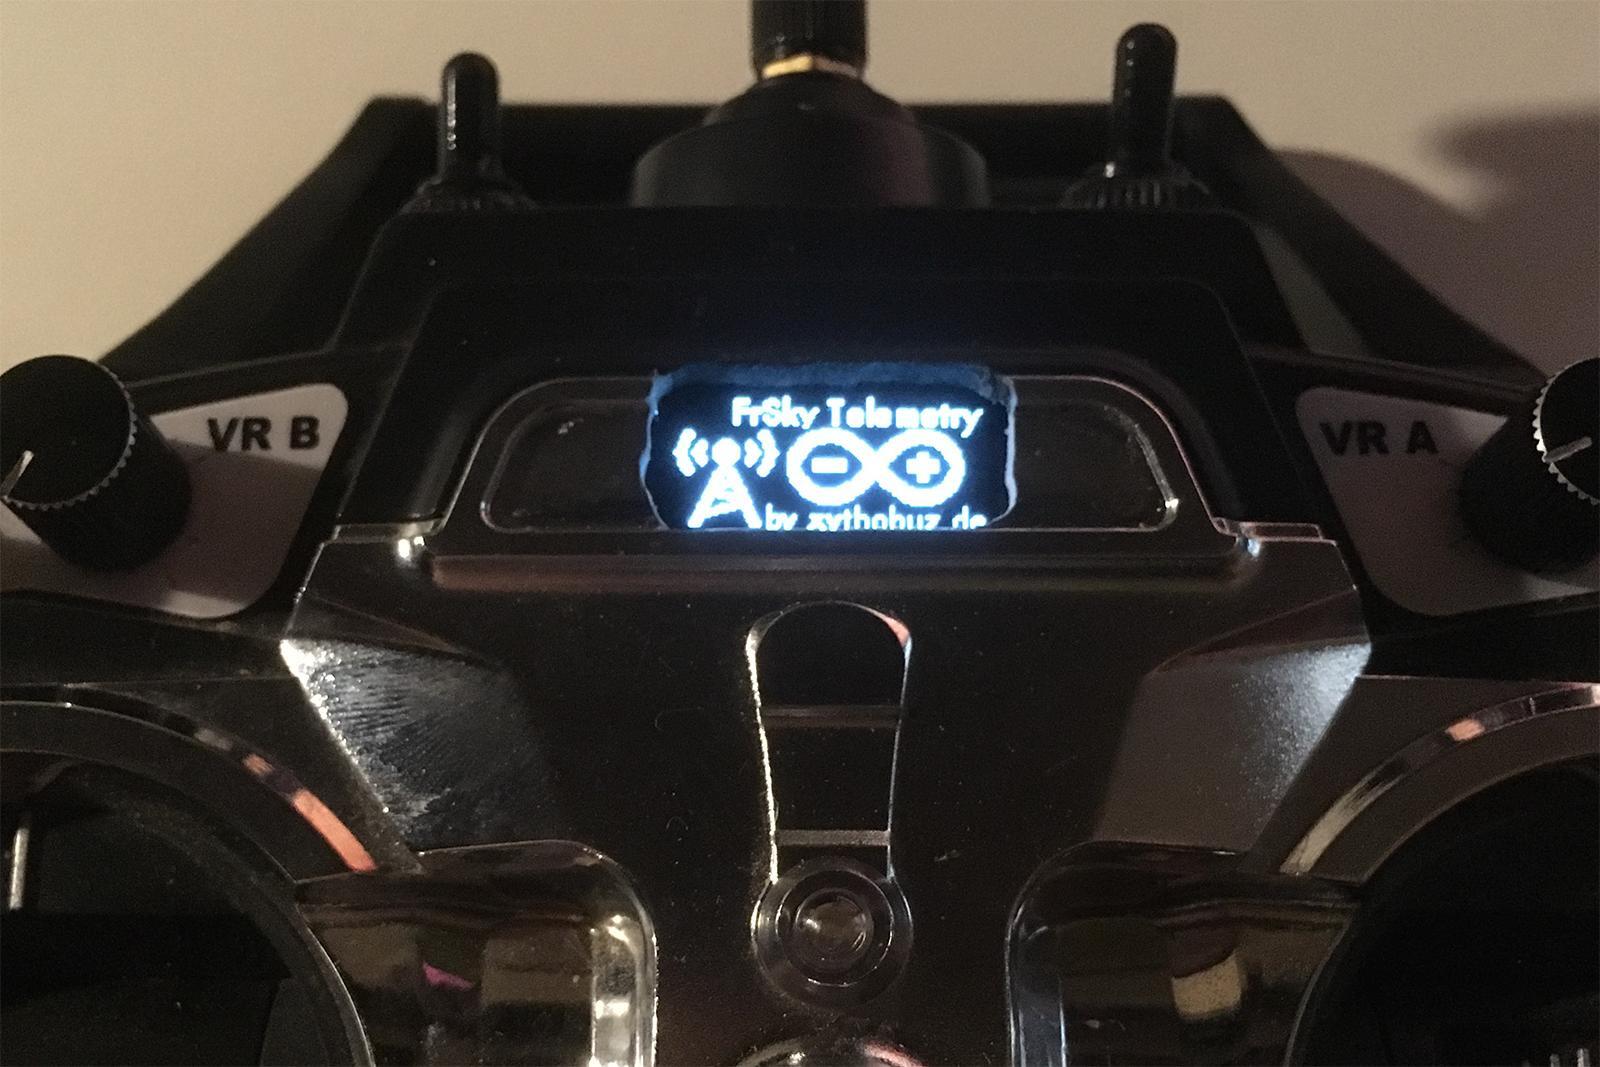
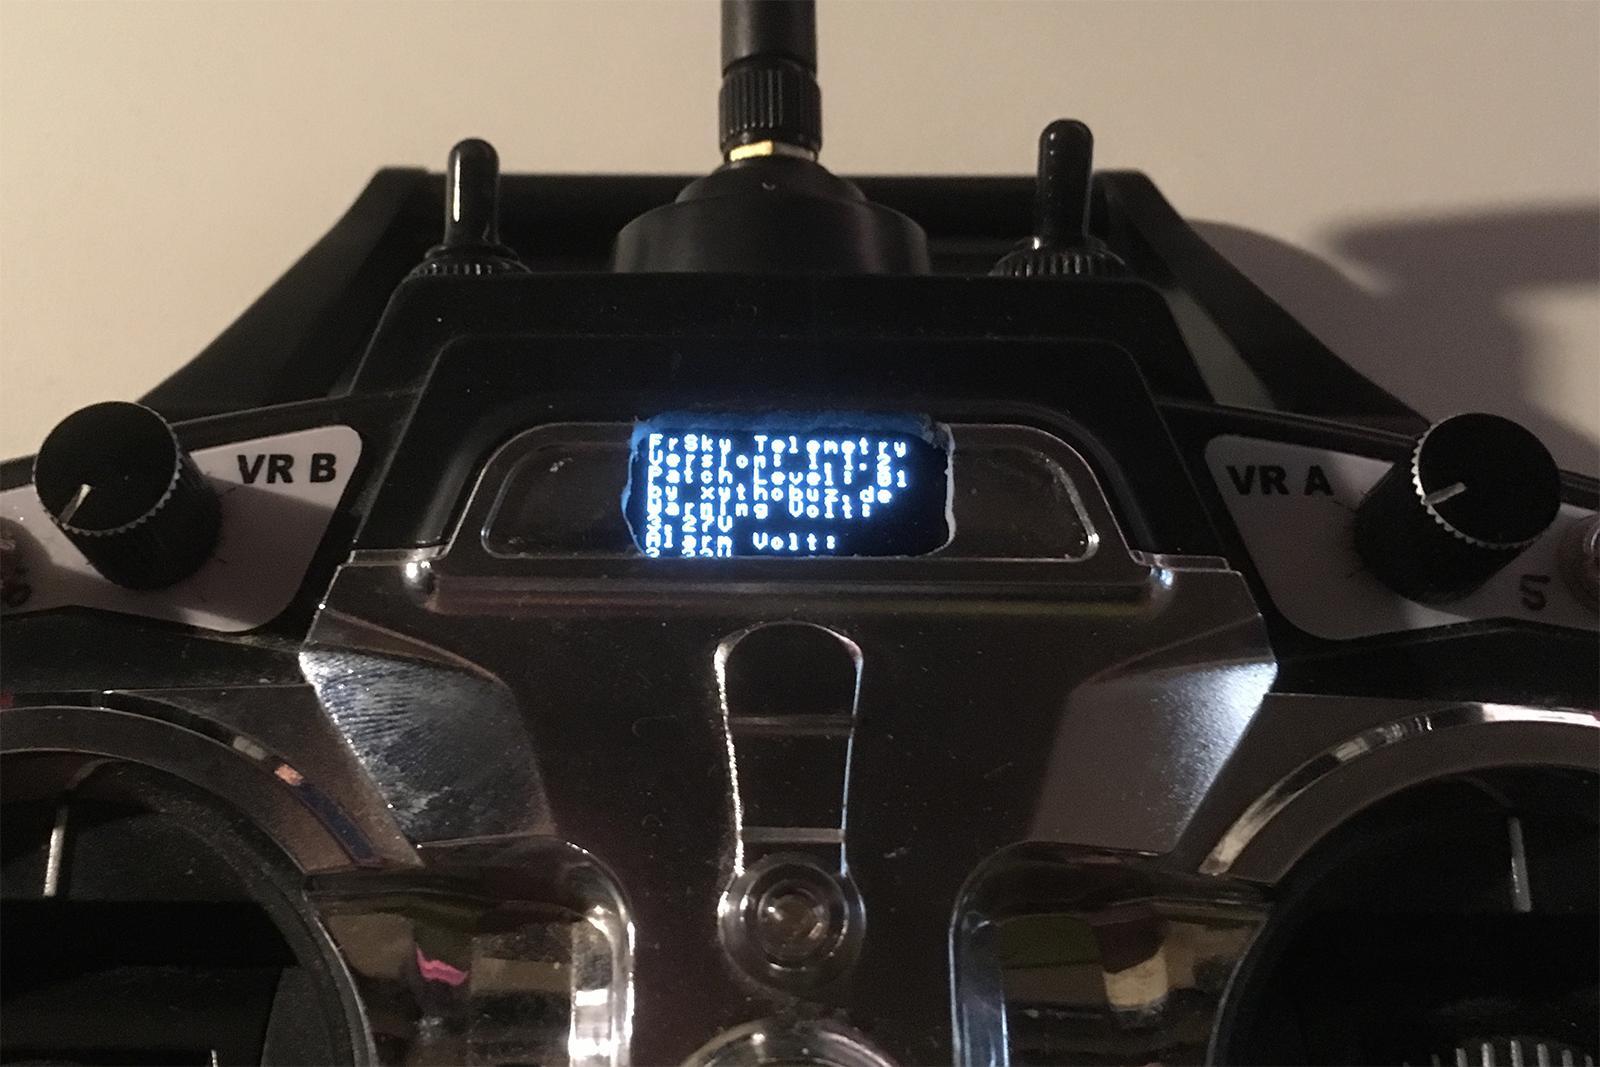
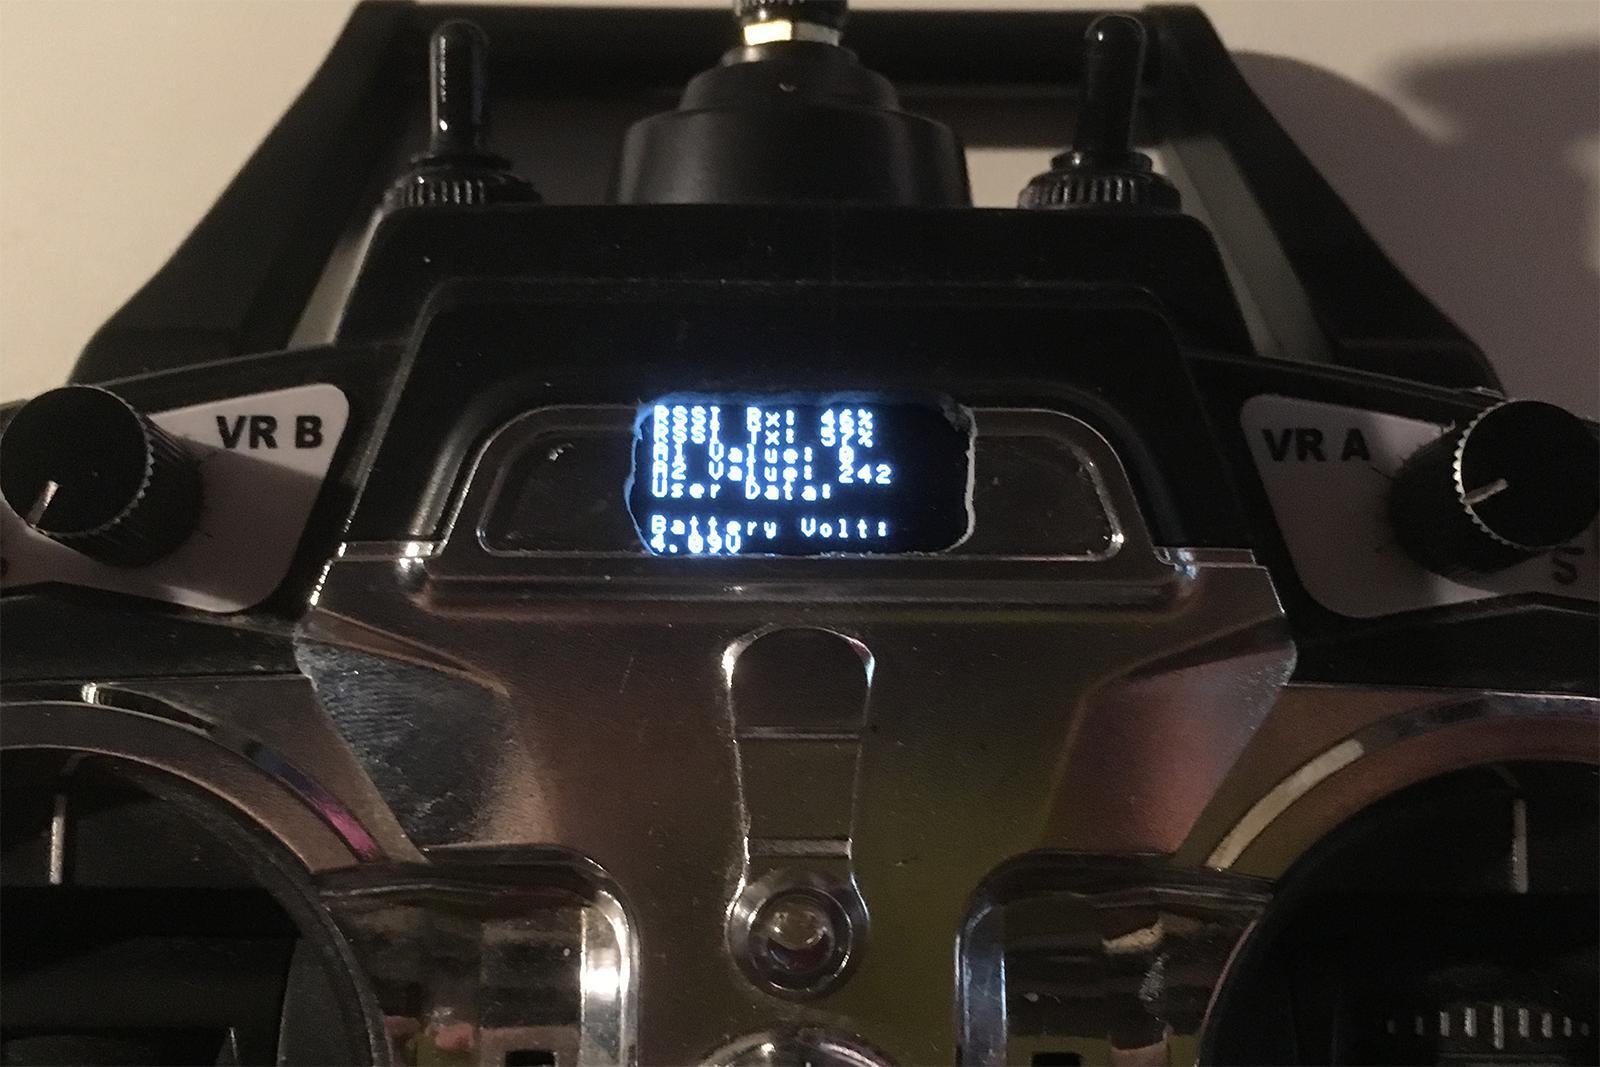
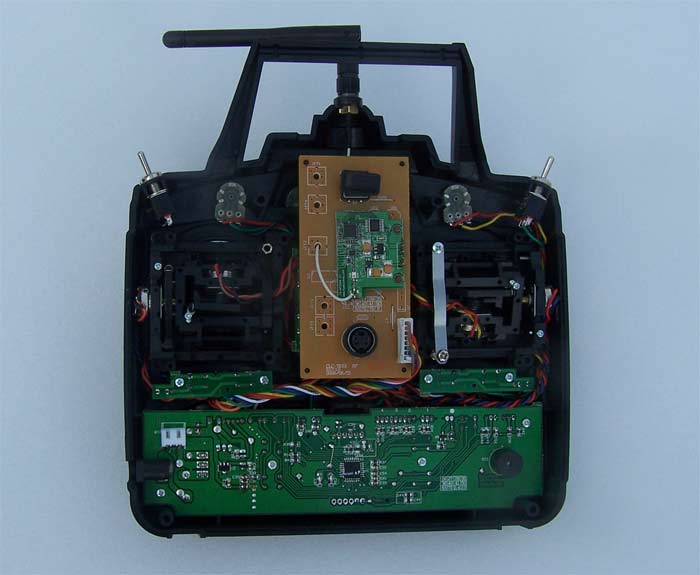
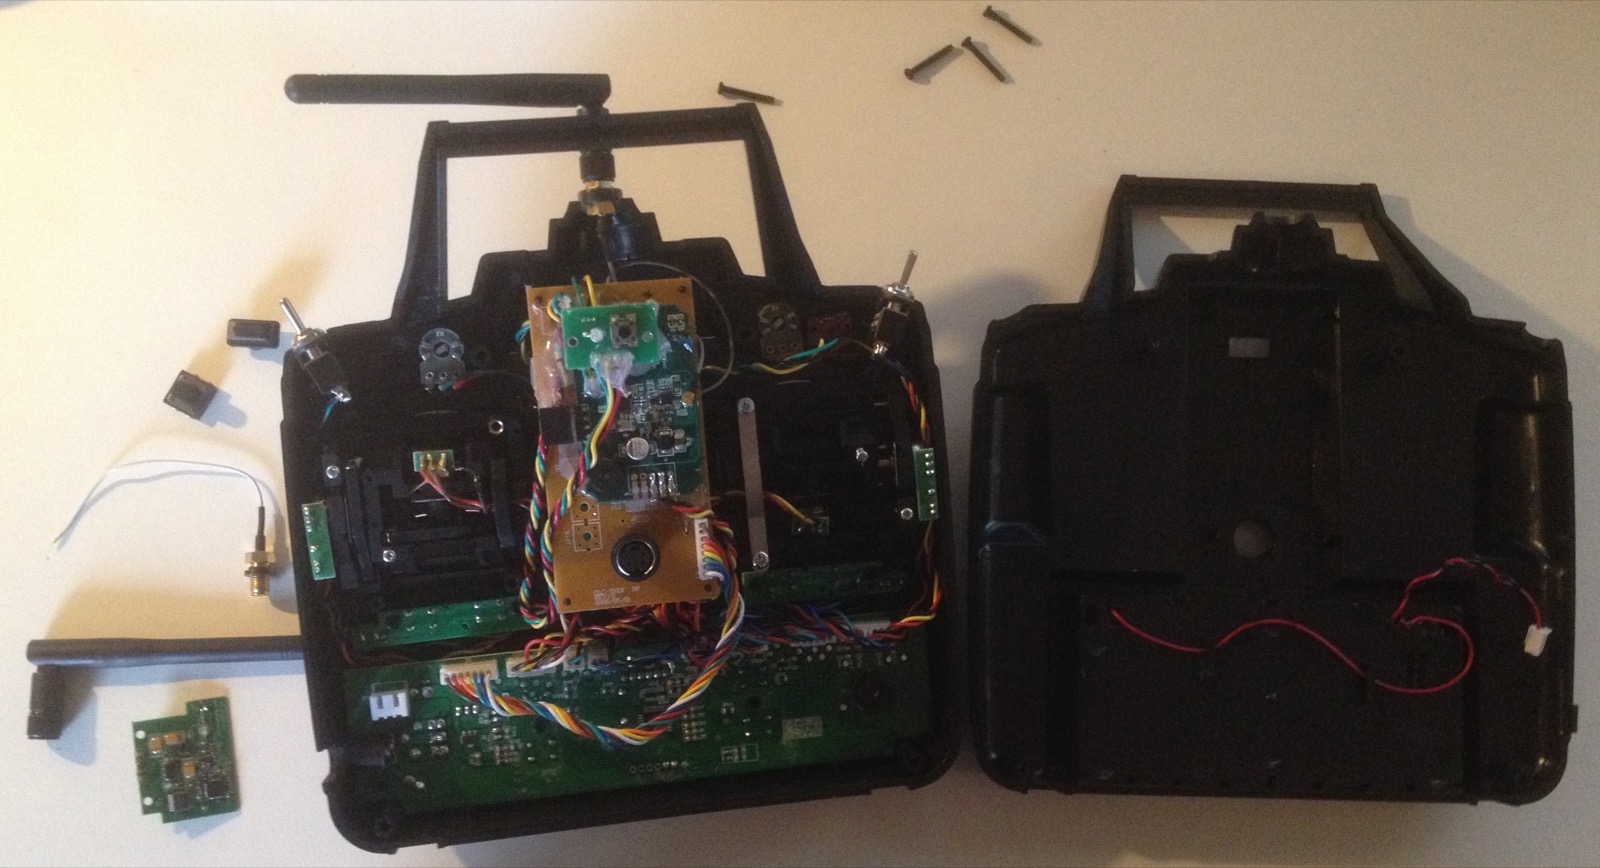
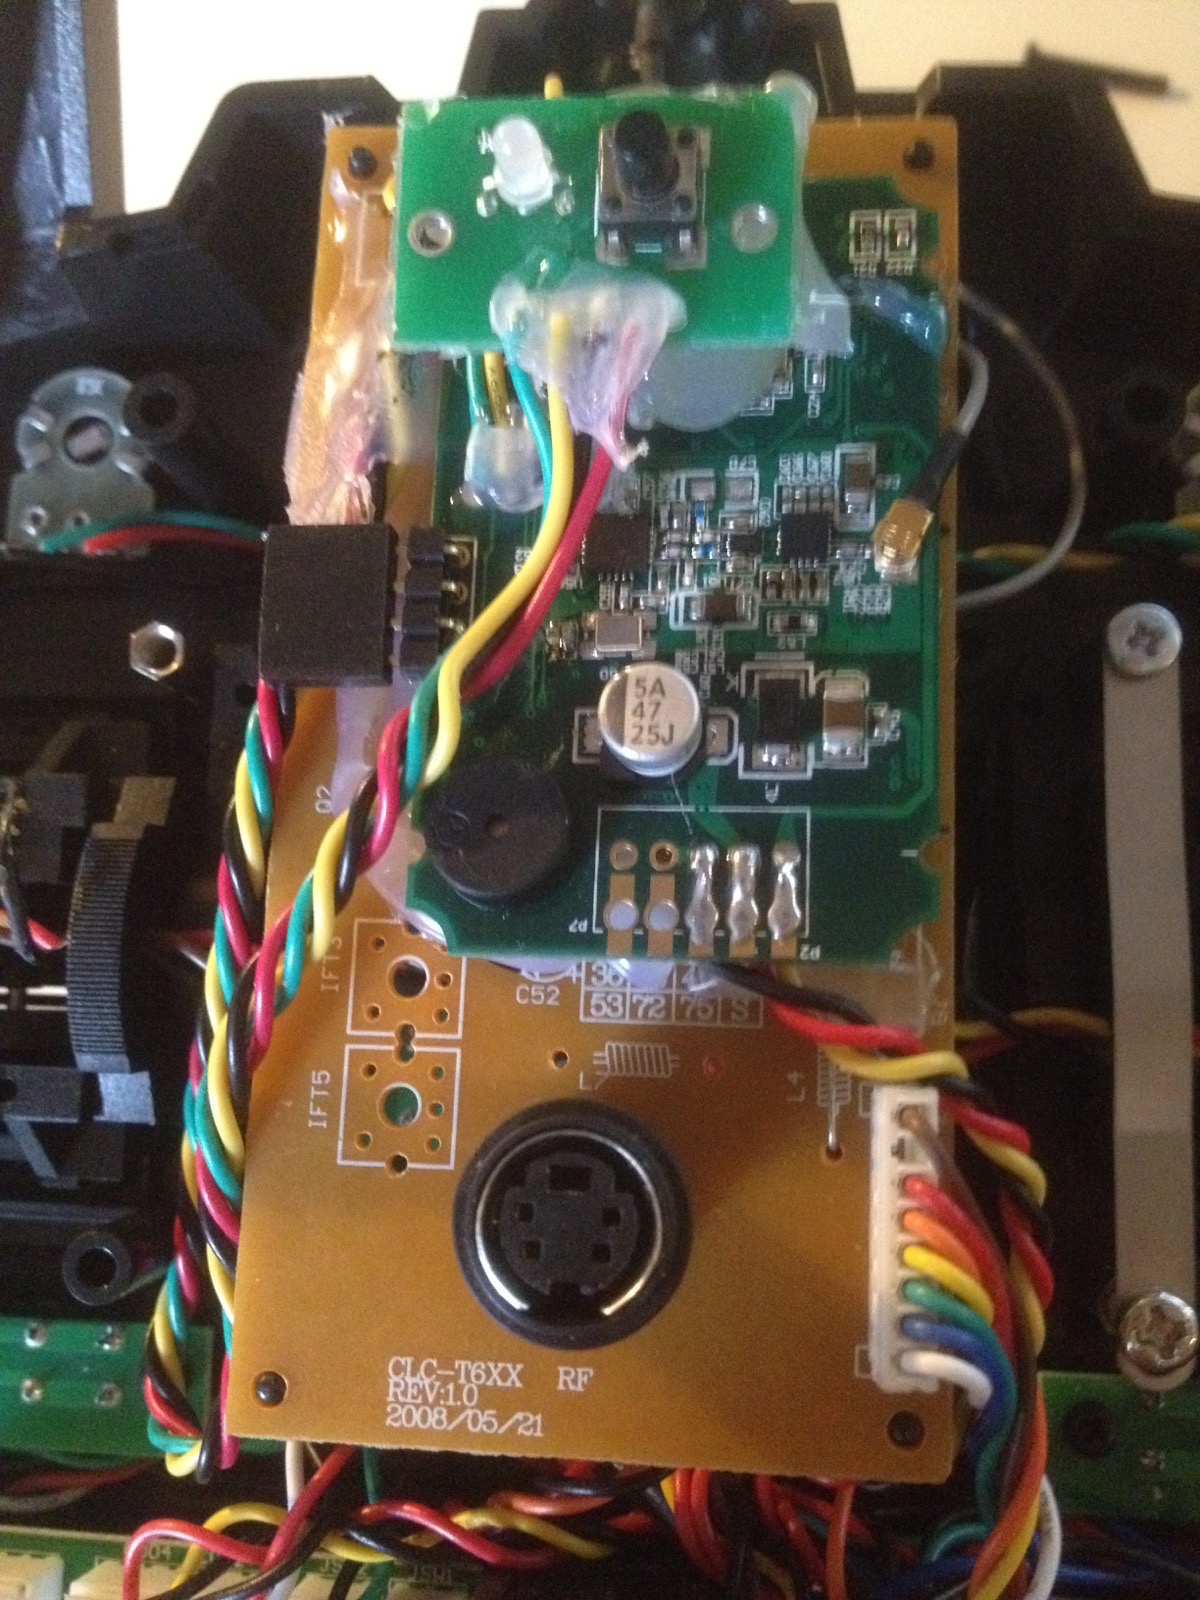
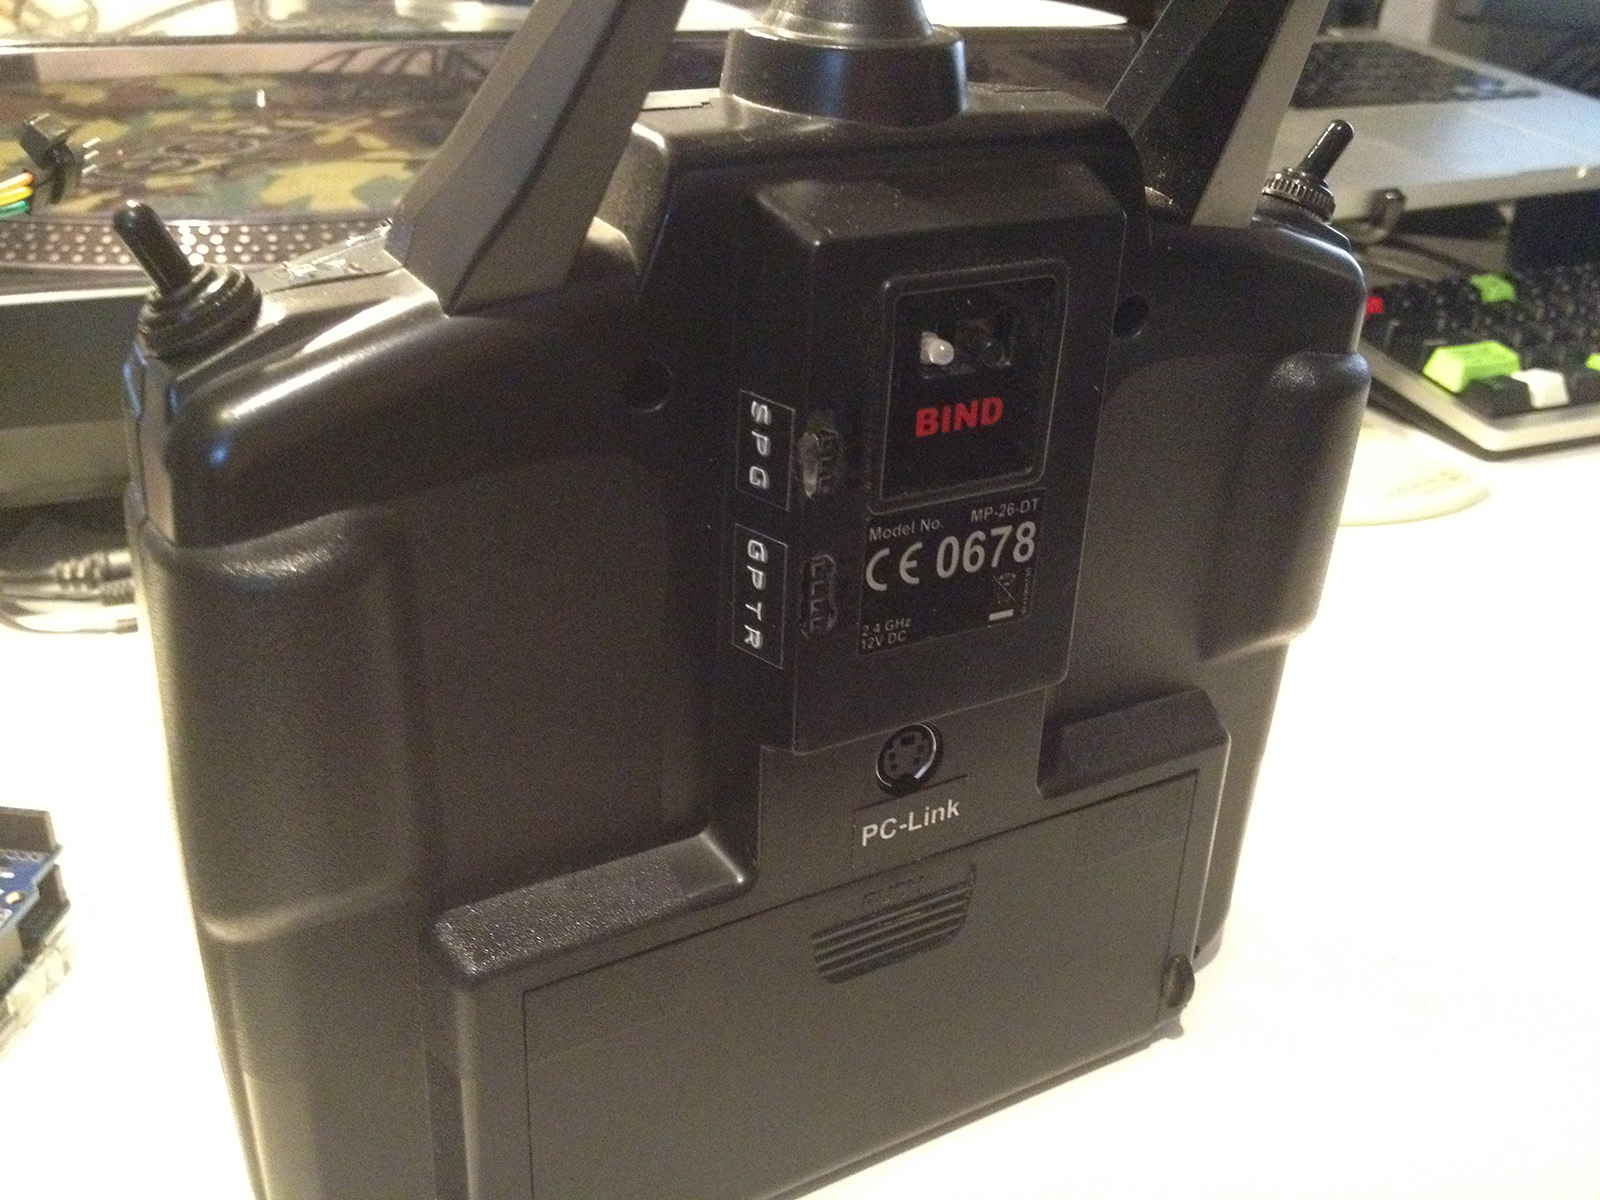
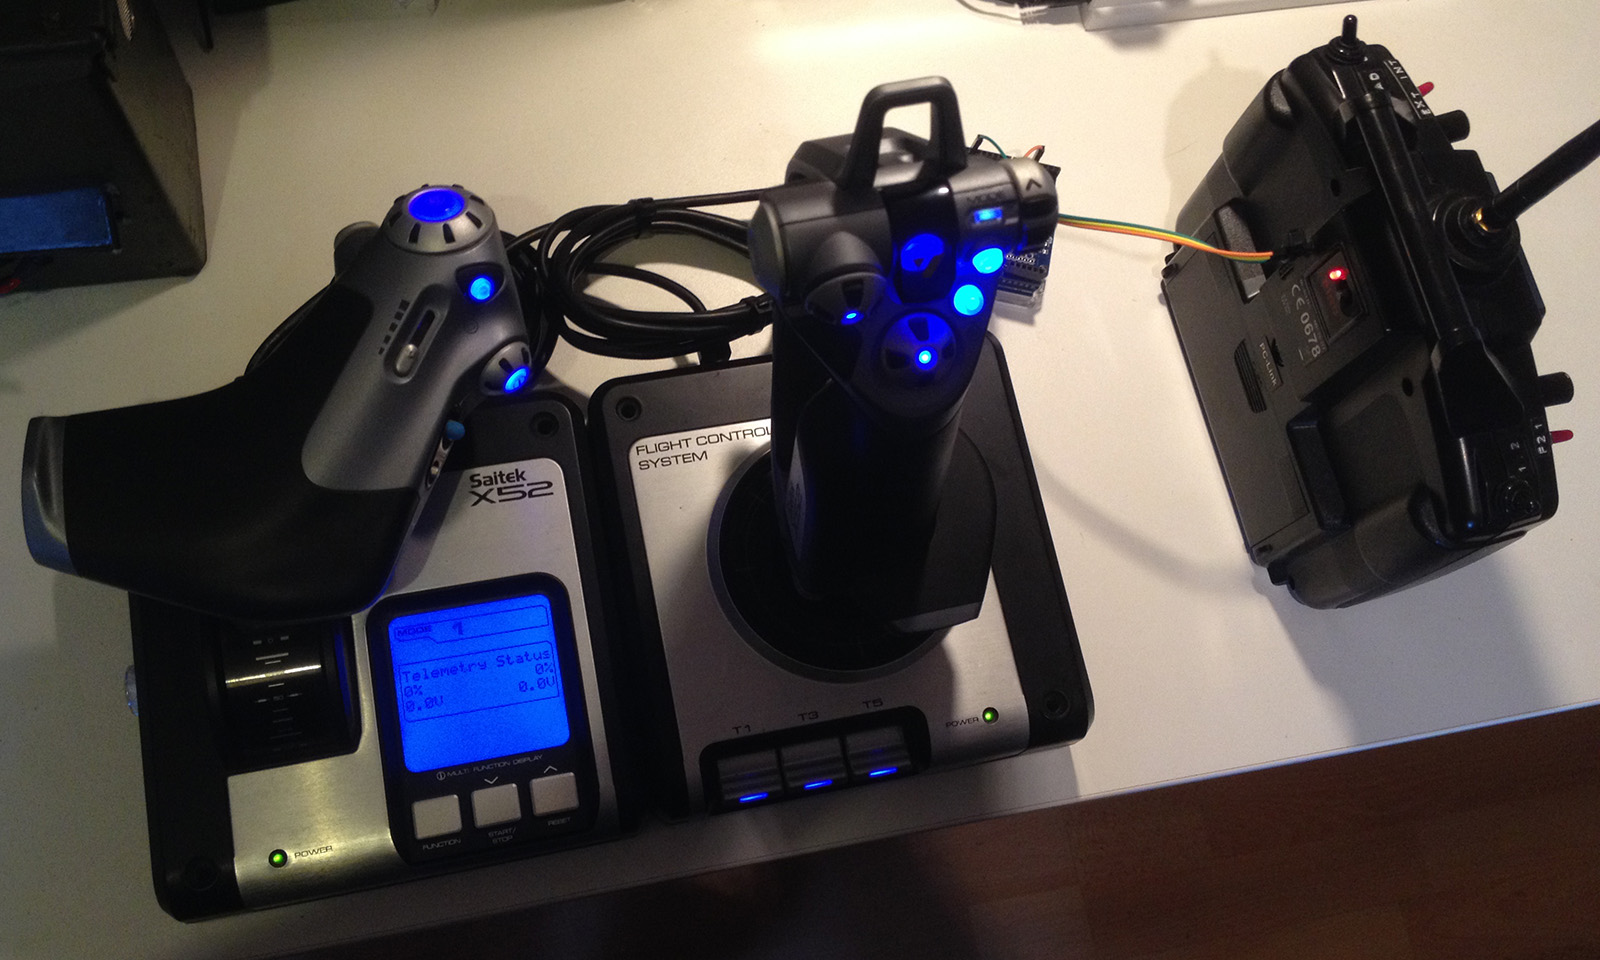
Many years ago, a long time before I even started getting into Quadcopters, my grandpa bought me a cheap 2.4GHz Transmitter from Conrad Elektronik. Because this was already available when I started building my own copters, I used it for that as well. Turns out, it is a Flysky-clone, with it's own shoddy PC software. So I wrote my own Mac driver for it. After using it with its original receiver for a while, I decided to move into the FrSky ecosystem. So I swapped out the built-in transmitter for a FrSky DHT with the TTL mod to connect my own telemetry display.
Also see the article about my Saitek X52 USB joystick experiments.
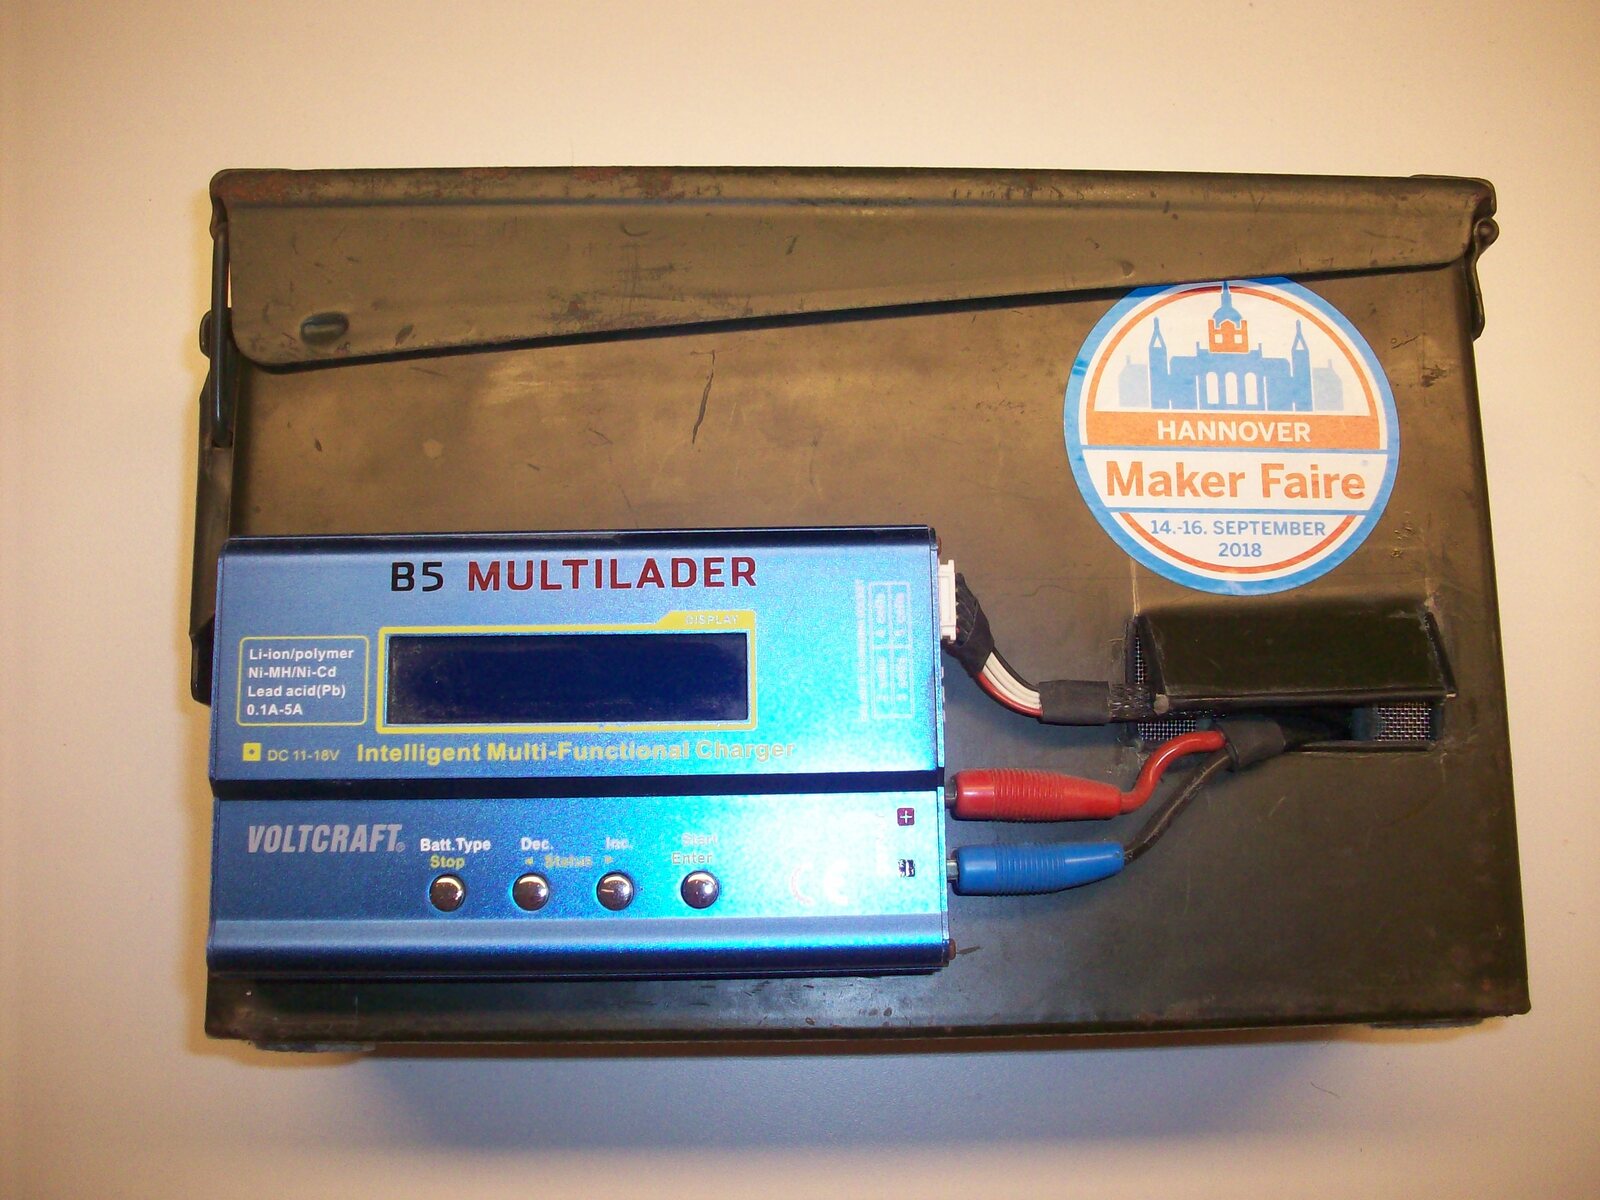
Ammo Can Battery Charging
Having so many high-capacity LiPo batteries around because of this hobby is kinda scary of course, after looking at a bunch of battery fires on YouTube. So I at least wanted to have some kind of fire-proof enclosure for charging my batteries in. I decided to go the common ammo-can route for this.
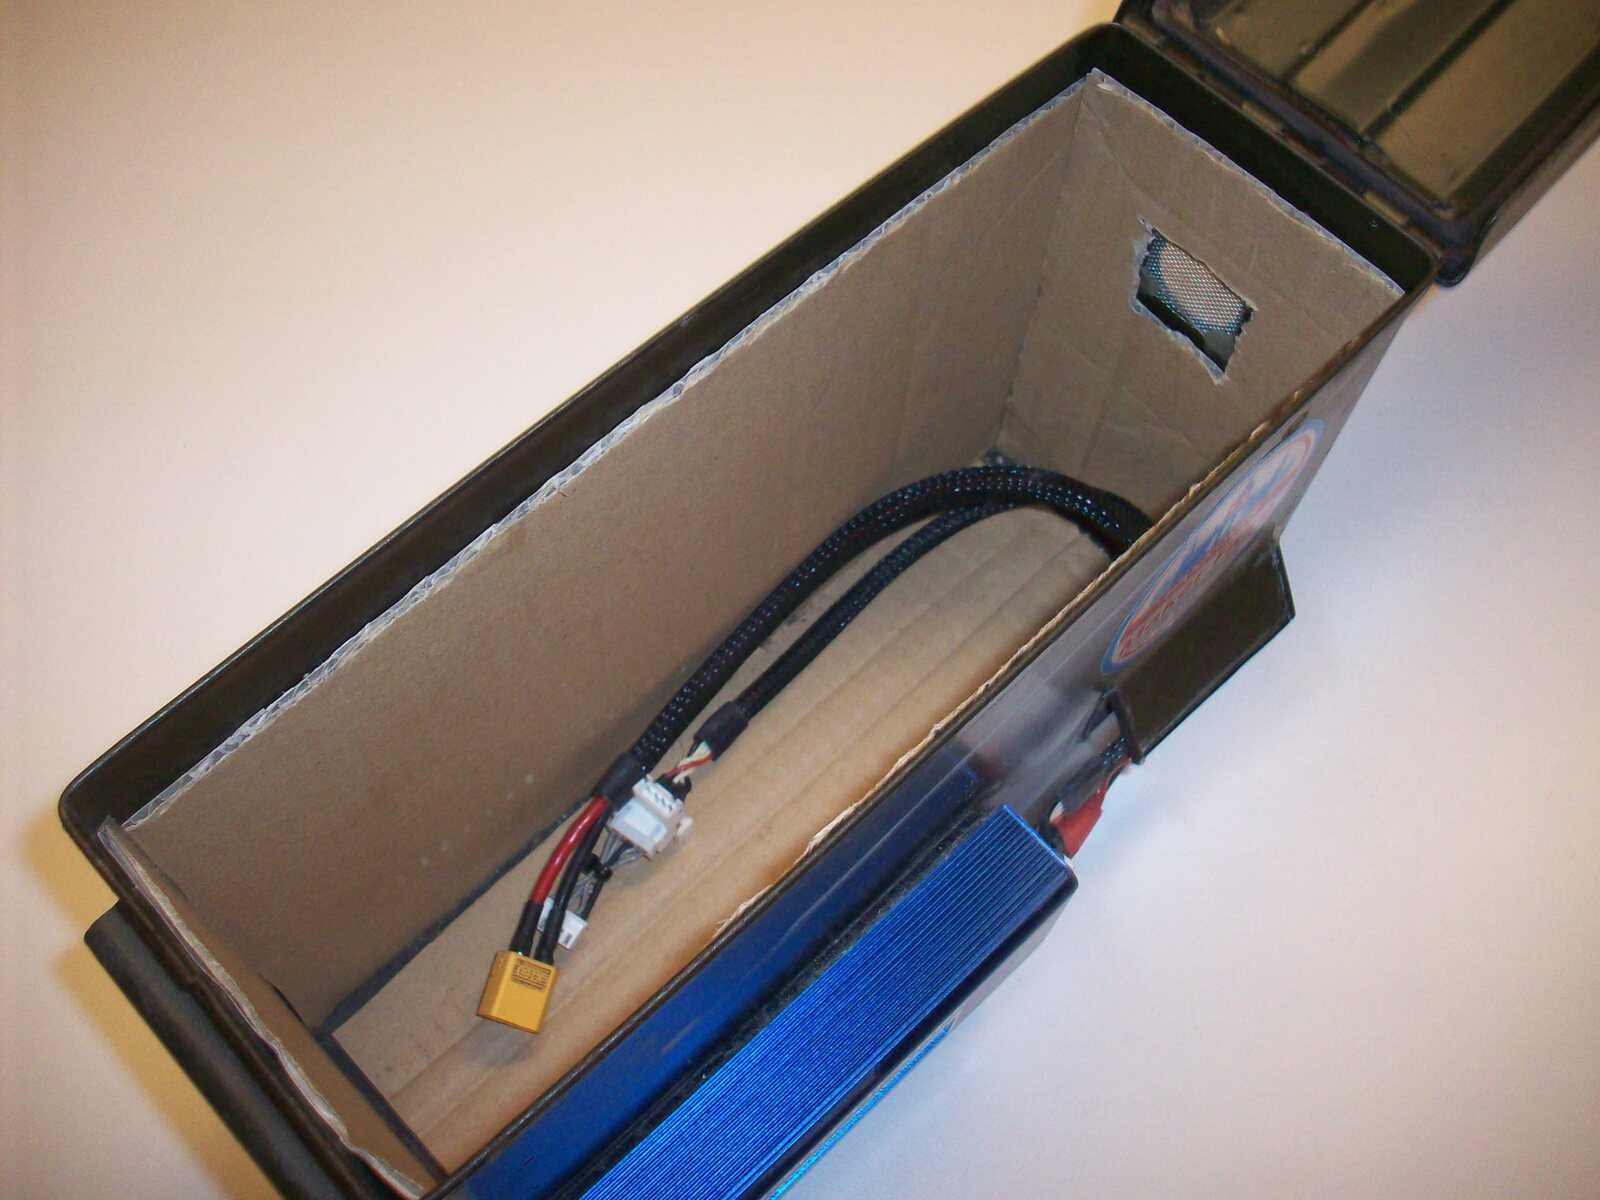
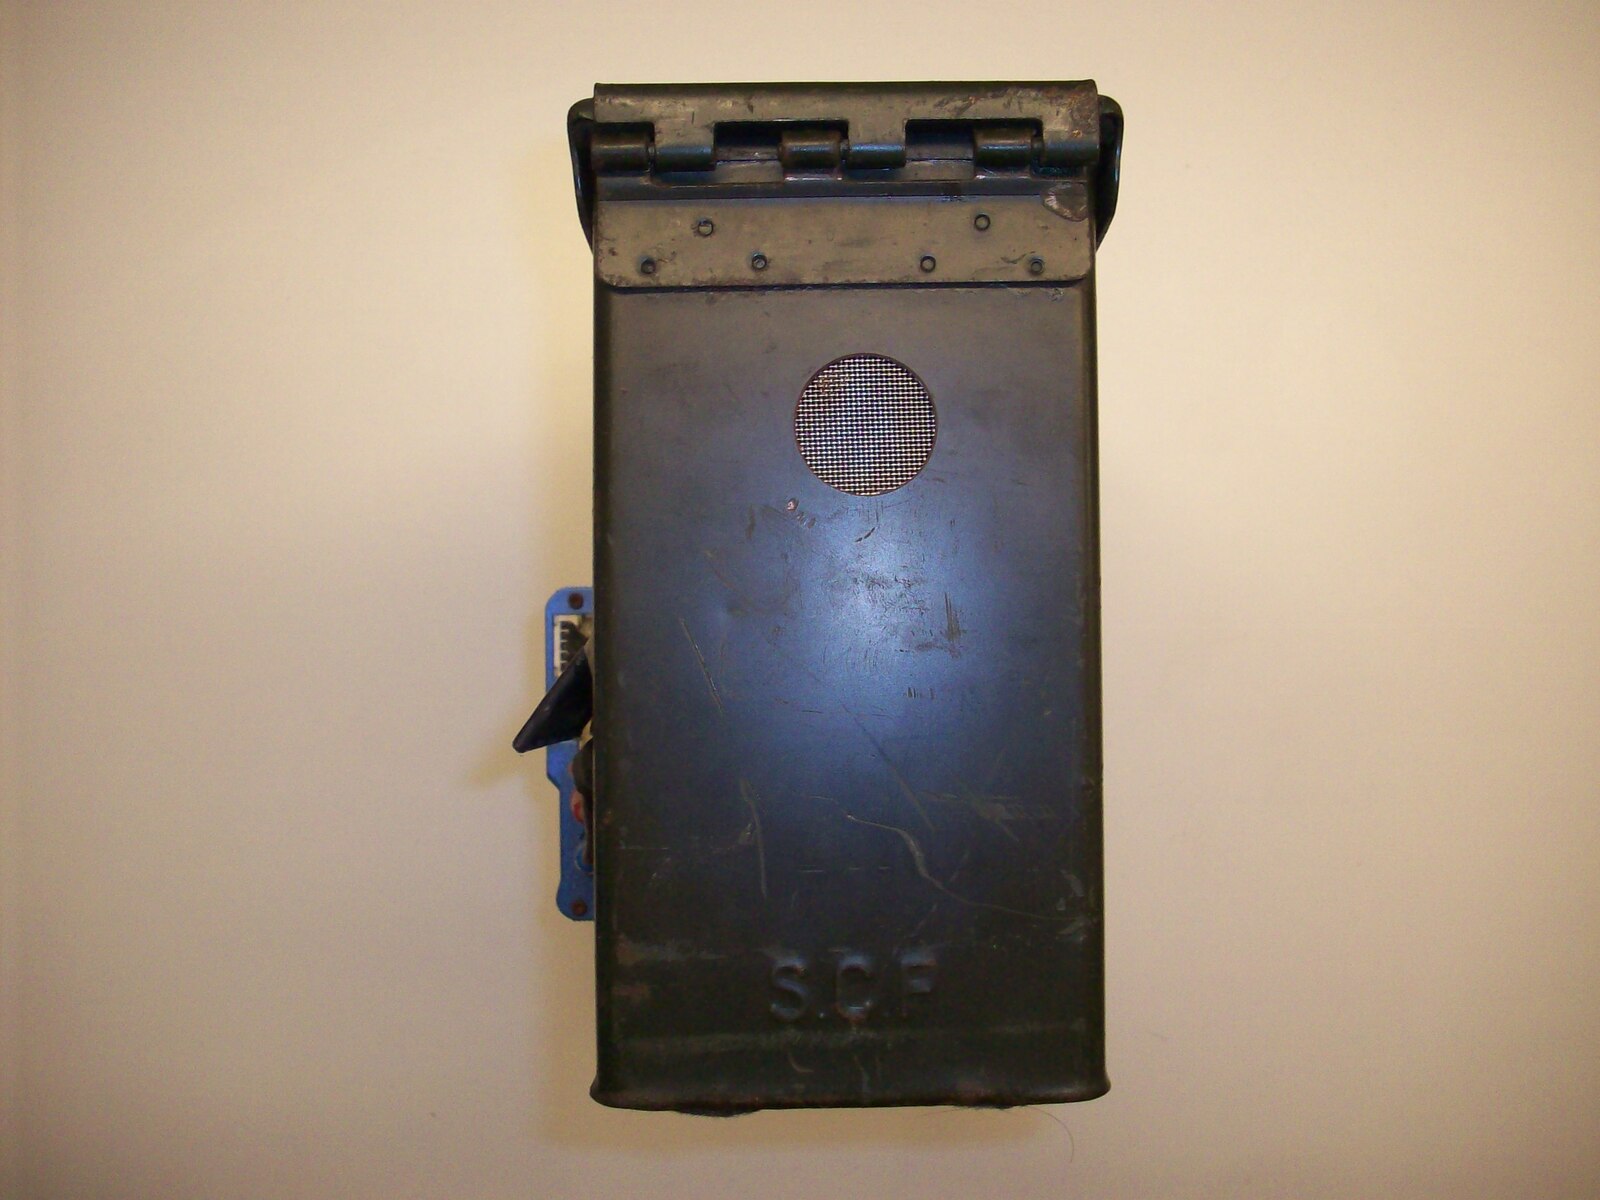
When doing this, it is very important to modify the can so it no longer is pressure-tight. Otherwise you're building something more like a bomb. Many people remove the seal in the lid for this, but I decided to drill a couple of large holes into the can, as well as a rectangular cutout for the charging cables.
The holes have a piece of mesh glued in front of them, to keep debris out. And the inner walls of the can have been padded with cardboard, to prevent any chance of short-circuiting on the metal sheet of the can.
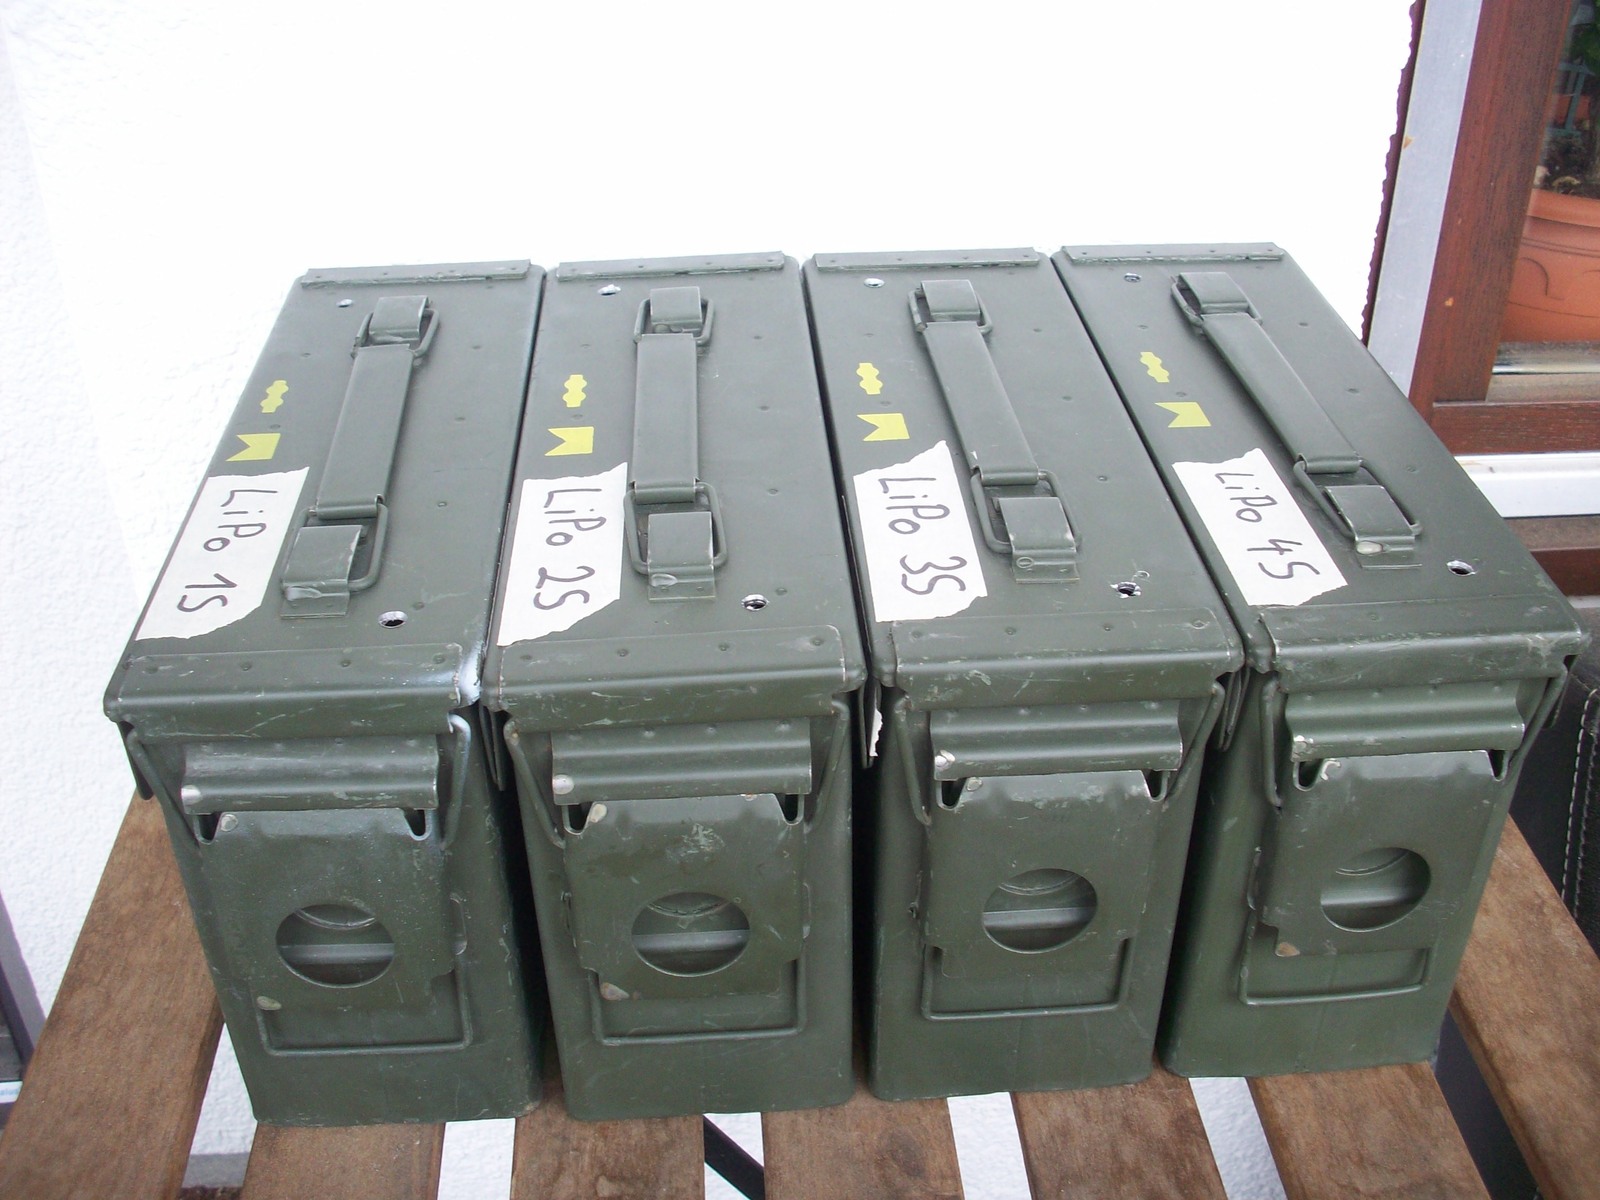
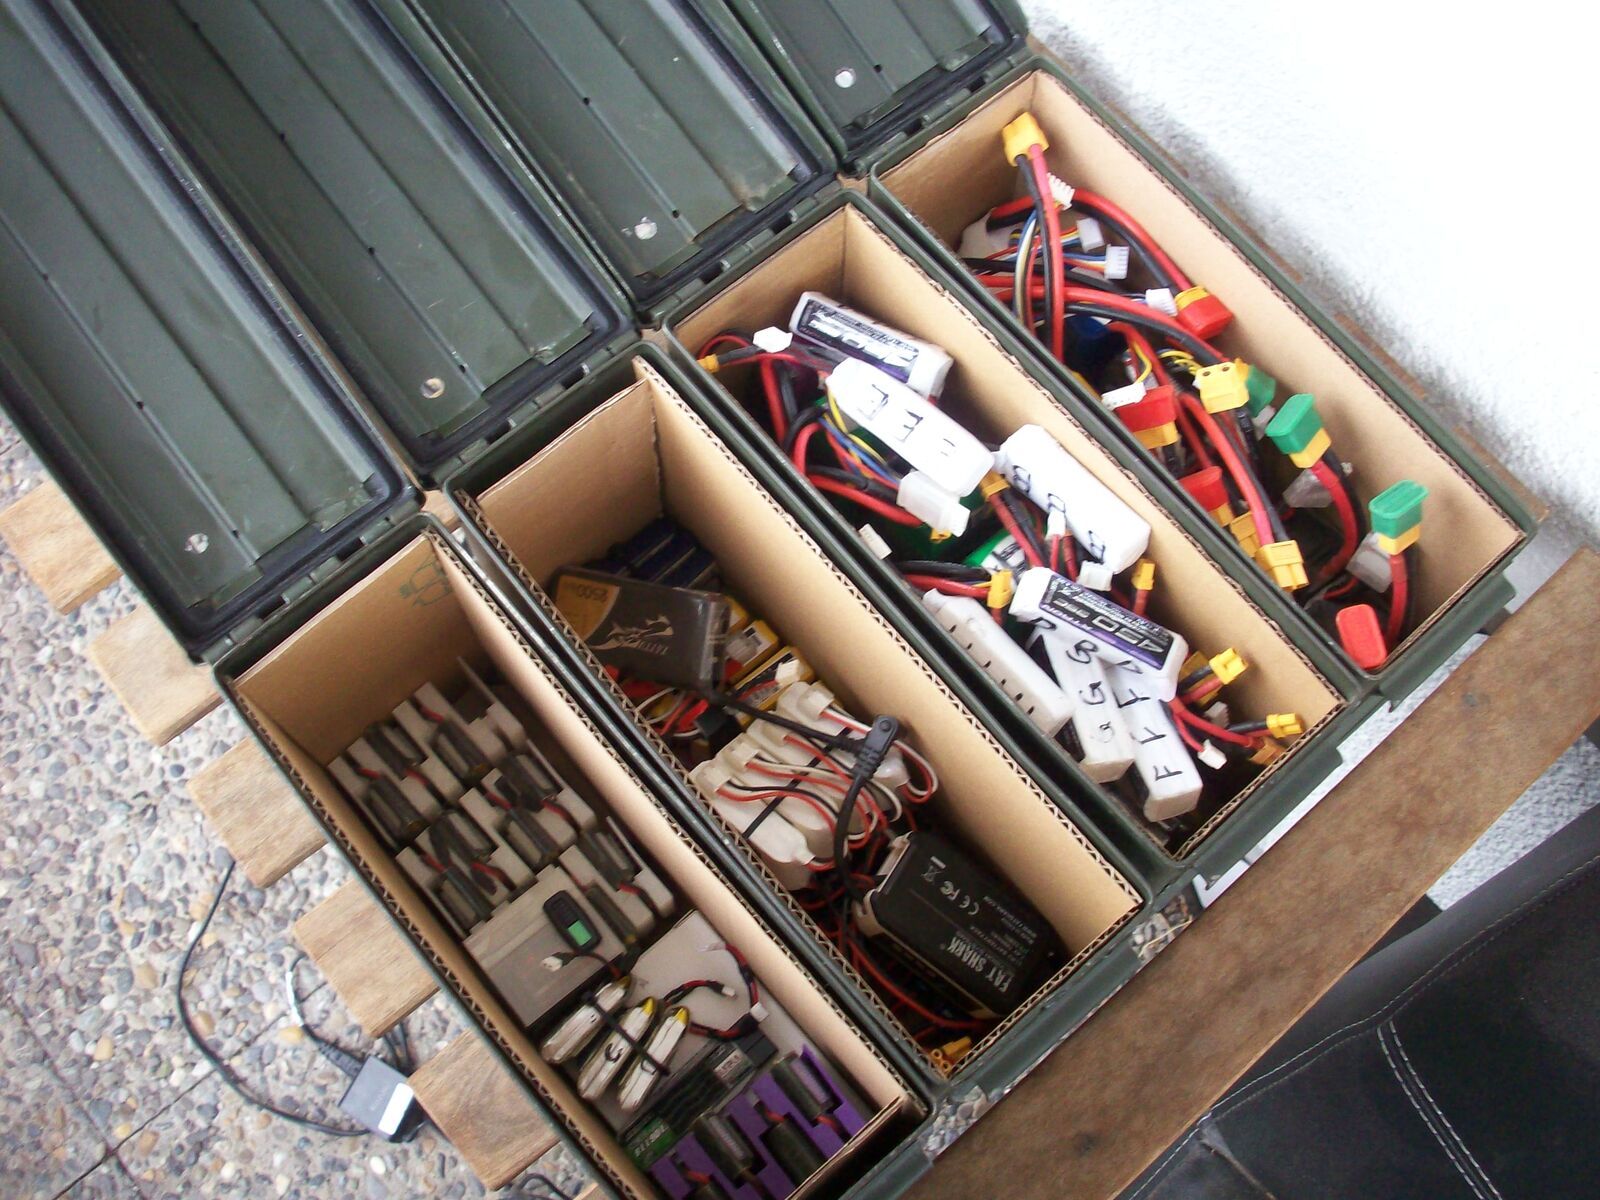
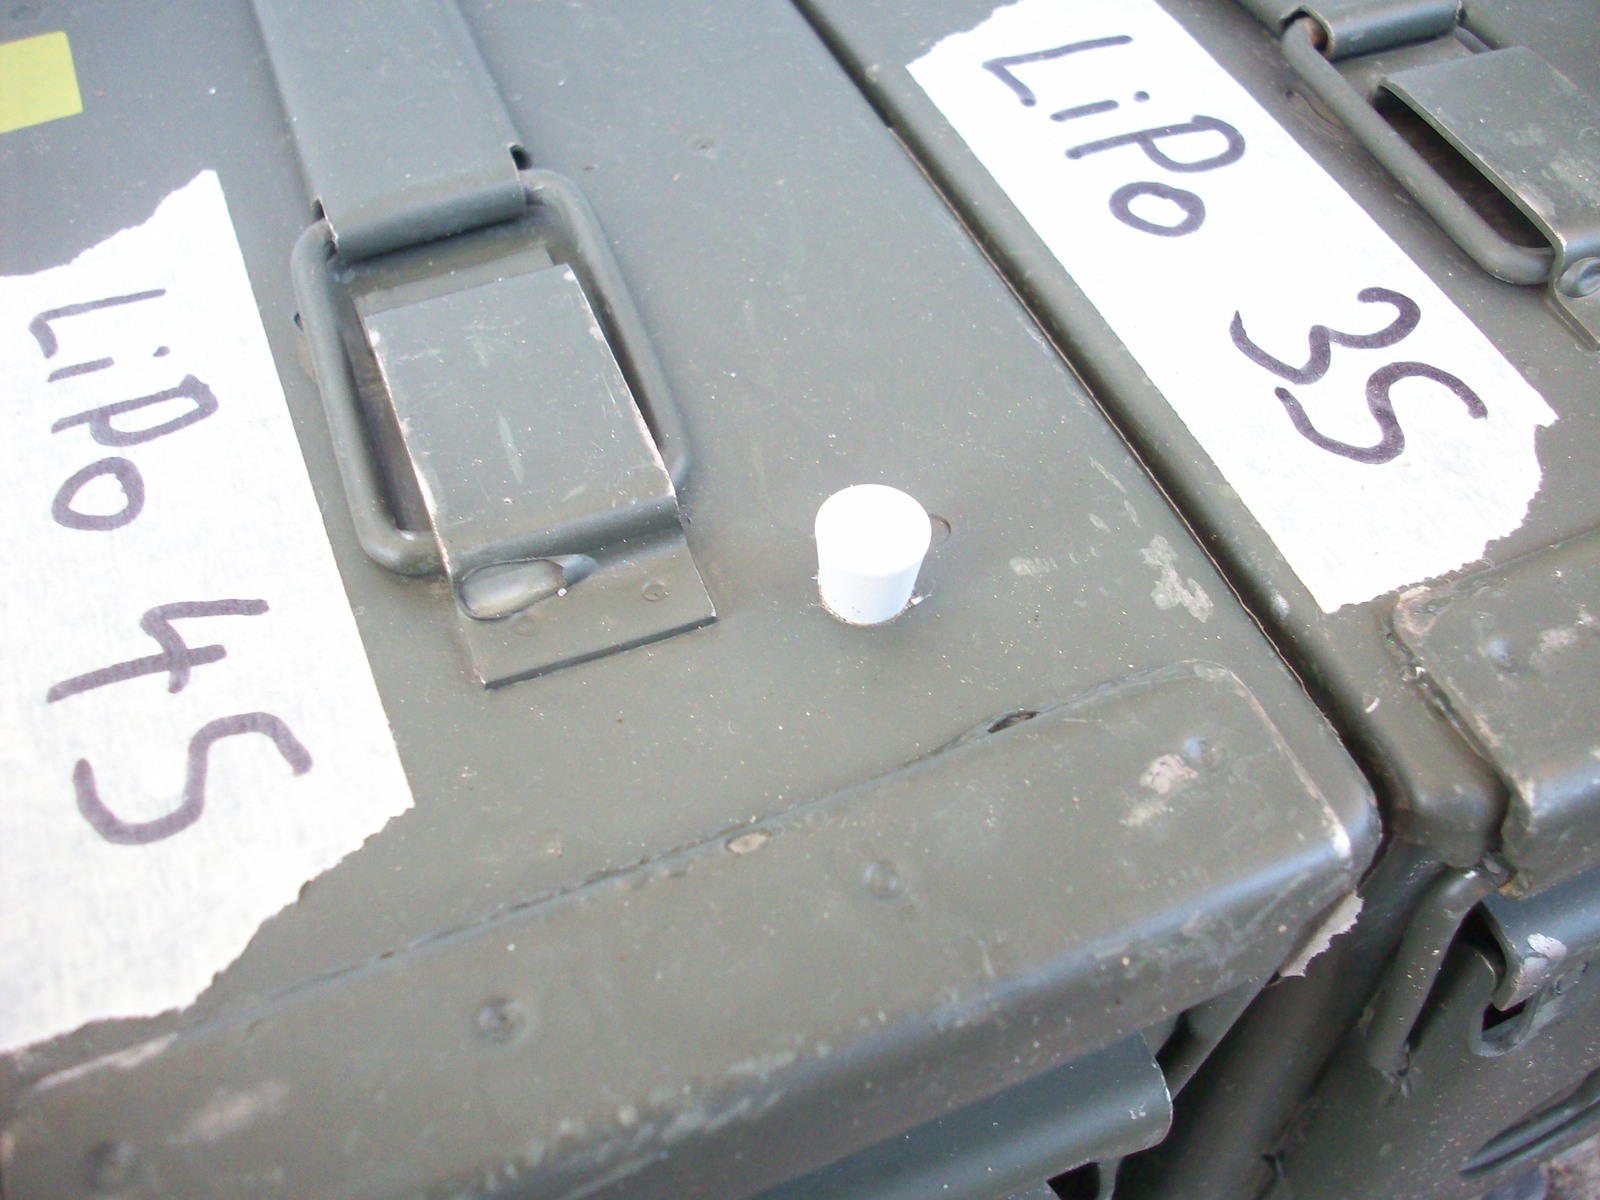
Ammo Can Battery Storage
For far too long I stored all my LiPos in a cardboard box on a wooden shelf in my livingroom. After seeing one too many videos of LiPo fires, I decided to work on a solution for safe storage of the batteries outside, on my balcony. Like with the charger described right above this section, I decided to get some used ammo cans for this project.
When you buy an ammo can like this used, I recommend giving it a thorough soap and sponge wash on both the inside and outside. Then you can pull out the gasket in the top with a large flathead screwdriver. Give it a good clean as well, and rub some oil on the gasket so it goes back in easier and lives longer.
The most important part of a storage solution like this is the ability to vent gases that expand in case of a LiPo failure. So we absolutely need to add some holes to either the base can or the lid. This time I decided to put two 5mm holes in the lid of each one. Just to make sure no water gets in through the vents, I added rubber plugs, which can be pushed out easily by the expanding gas in an emergency. This way I feel relatively safe storing the cans on my balcony.
Like with my charging can, I also added some cardboard on the inside for preventing any possibility of short circuits.
Spectator Monitor 2
The files for the modified 3D printed case can be found on my Thingiverse profile.

